
Switching from frying to baking onion rings might seem like a small change, but it’s a game-changer in my kitchen. There’s less grease splattering everywhere, and I don’t have to wrestle with hot oil. Plus, the oven gives the onions a slow, even caramelization that deepens their natural sweetness.
Baked onion rings are that rare comfort food that feels indulgent without the heavy aftermath. The aroma of baked onions turning golden, mingling with a crispy coating, fills the house with a cozy, inviting smell. It’s a simple switch that makes this snack feel a little healthier, but still just as satisfying.
Focusing on baking onion rings instead of frying them, to achieve that crispy texture with less mess and guilt, while still capturing the deep, caramelized sweetness that makes onions irresistible.
The story behind this recipe
- This recipe sprouted from a lazy Sunday craving for something crispy and warm but without the usual greasy aftermath. I was experimenting with ways to get that deep-fried crunch in the oven, and these baked onion rings became a happy accident. Now, I keep coming back to them whenever I want comfort without the mess.
- There’s a nostalgia in the smell of caramelized onions and toasted coating that takes me straight to childhood snack stands, but baking keeps it simple and a bit more grown-up. It’s a reminder that sometimes, the best food is the one that’s both easy and satisfying, with just enough twist to make it feel special.
- heading:
Key ingredients and tips
- Sweet yellow onions: I love the warm, almost caramel scent as they cook; use firm, plump onions for the best sweet flavor. Swap with shallots for a milder, more delicate taste if you like.
- All-purpose flour: It creates that initial crunch and helps the coating stick; if you want gluten-free, rice flour works well but adds a slightly lighter crispness.
- Breadcrumbs: I prefer panko for extra airy crunch, but regular fine bread crumbs can work in a pinch—just expect a softer bite. Toast your breadcrumbs lightly beforehand for a richer flavor.
- Egg wash: It’s the glue that holds everything together; for a richer coating, add a splash of milk or a little hot sauce for a subtle kick. Skip if you want a vegan version—sub with a thickened plant-based milk.
- Spices & seasonings: I keep it simple with paprika, salt, and pepper—brighten with a pinch of cayenne for heat or garlic powder for depth. Fresh herbs can add a surprising twist right out of the oven.
- Cooking spray or oil: I use a light spray to help with browning but avoid drenching the rings; a quick spritz gives that crispy, golden finish without excess greasiness.
- Optional: Parmesan or nutritional yeast: For a cheesy, savory boost, sprinkle a little on before baking. It melts into the coating, adding umami without the fuss.
Spotlight on key ingredients
Yellow onions:
- Sweet yellow onions: I love the warm, almost caramel scent as they cook; use firm, plump onions for the best sweet flavor. Swap with shallots for a milder, more delicate taste if you like.
- All-purpose flour: It creates that initial crunch and helps the coating stick; if you want gluten-free, rice flour works well but adds a slightly lighter crispness.
Breadcrumbs & eggs:
- Breadcrumbs: I prefer panko for extra airy crunch, but regular fine bread crumbs can work in a pinch—just expect a softer bite. Toast your breadcrumbs lightly beforehand for a richer flavor.
- Egg wash: It’s the glue that holds everything together; for a richer coating, add a splash of milk or a little hot sauce for a subtle kick. Skip if you want a vegan version—sub with a thickened plant-based milk.
Notes for ingredient swaps
- Sweet yellow onions: I love the warm, almost caramel scent as they cook; use firm, plump onions for the best sweet flavor. Swap with shallots for a milder, more delicate taste if you like.
- All-purpose flour: It creates that initial crunch and helps the coating stick; if you want gluten-free, rice flour works well but adds a slightly lighter crispness.
- Breadcrumbs: I prefer panko for extra airy crunch, but regular fine bread crumbs can work in a pinch—just expect a softer bite. Toast your breadcrumbs lightly beforehand for a richer flavor.
- Egg wash: It’s the glue that holds everything together; for a richer coating, add a splash of milk or a little hot sauce for a subtle kick. Skip if you want a vegan version—sub with a thickened plant-based milk.
- Spices & seasonings: I keep it simple with paprika, salt, and pepper—brighten with a pinch of cayenne for heat or garlic powder for depth. Fresh herbs can add a surprising twist right out of the oven.
- Cooking spray or oil: I use a light spray to help with browning but avoid drenching the rings; a quick spritz gives that crispy, golden finish without excess greasiness.
- Optional: Parmesan or nutritional yeast: For a cheesy, savory boost, sprinkle a little on before baking. It melts into the coating, adding umami without the fuss.
Equipment & Tools
- Baking sheet: To hold the onion rings while baking evenly.
- Parchment paper or silicone mat: To prevent sticking and facilitate easy cleanup.
- Three shallow bowls: For flour, egg wash, and breadcrumb coating setup.
- Mixing spoon or fork: To whisk the eggs and toss the onion rings in coating.
- Spray bottle or pastry brush: To lightly oil the coated rings for crispness.
Step-by-step guide to baked onion rings
- Preheat your oven to 200°C (390°F). Line a baking sheet with parchment paper or a silicone mat for easy cleanup.
- Slice onions into 1 cm (about ½ inch) thick rings. Separate the rings gently with your fingers, aiming for uniform size.
- Prepare three bowls: one with flour seasoned with a pinch of salt and pepper, one with beaten eggs, and one with panko breadcrumbs mixed with paprika and garlic powder.
- Dip each onion ring in the flour first, shaking off excess. Then, dunk in the beaten eggs, ensuring full coverage. Finally, coat evenly in the breadcrumb mixture, pressing lightly to adhere.
- Arrange coated rings on the prepared baking sheet, leaving space between each. Spray lightly with cooking spray or a generous mist of oil for extra crispness.
- Bake in the oven for 20-25 minutes, turning once halfway through. Keep an eye on them; they should turn golden brown and crispy around the edges.
- Once baked, remove from oven and let rest for 2-3 minutes. This allows the coating to firm up and prevents sogginess.
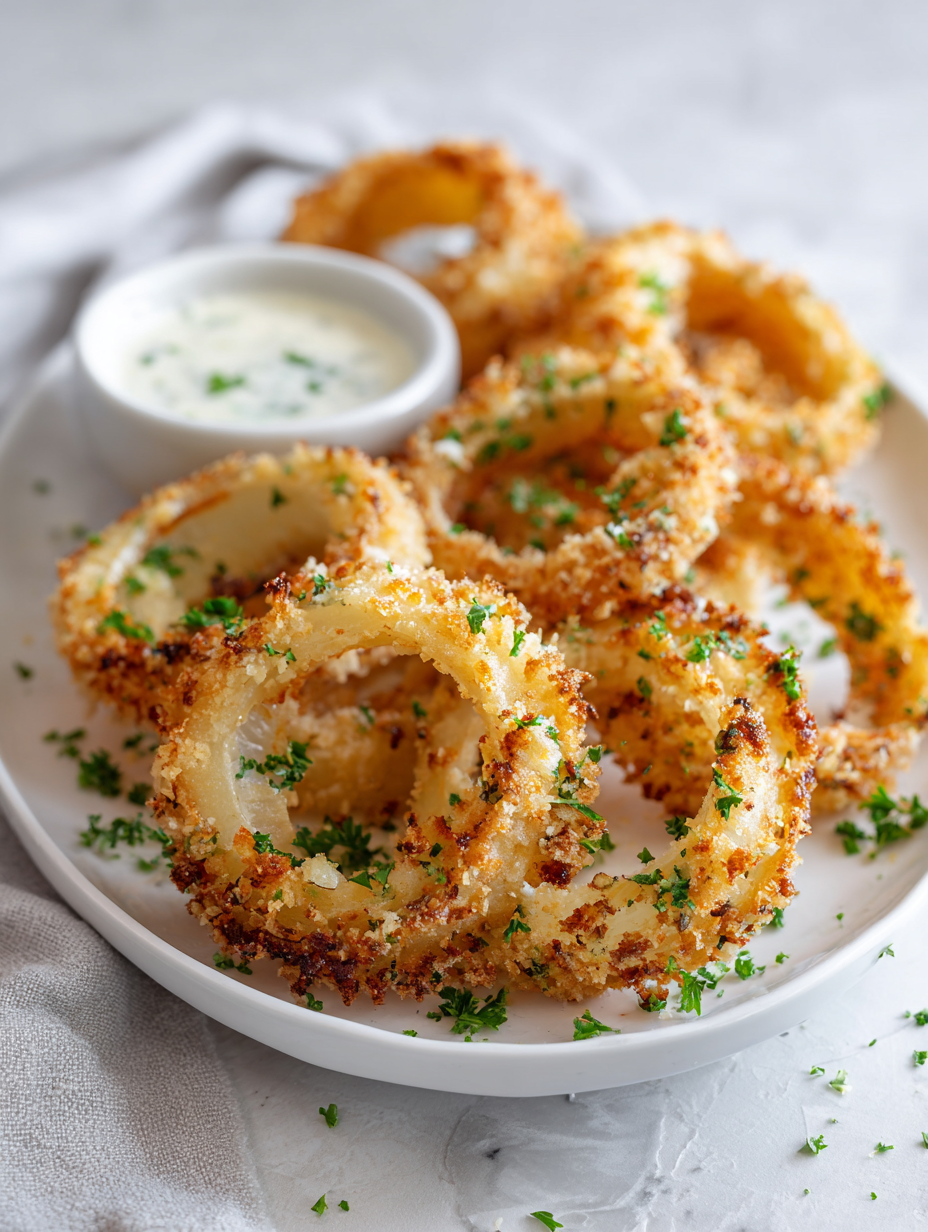
- Plate immediately, perhaps with a side of spicy ketchup or a cool ranch dip. Serve warm and crispy.
Let the onion rings rest for a couple of minutes after baking to set the coating. Serve immediately with your favorite dip for maximum crunch and flavor.
How to Know It’s Done
- Golden-brown edges with crispy coating observed visually.
- Onion rings should feel firm but not hard when gently pressed.
- A fragrant aroma of toasted breadcrumbs and caramelized onions fills the kitchen.
Baked Onion Rings
Ingredients
Equipment
Method
- Preheat your oven to 200°C (390°F) and line a baking sheet with parchment paper or a silicone mat for easy cleanup.
- Peel the onions and slice them into 1 cm (½ inch) thick rings. Gently separate the rings with your fingers, aiming for uniform pieces that will cook evenly.
- Set up three shallow bowls: one with seasoned flour, one with beaten eggs, and one with toasted panko breadcrumbs mixed with paprika, salt, and pepper.
- Dip each onion ring into the flour first, turning to coat evenly and shaking off excess. Then, dip into the egg wash, ensuring full coverage.
- Next, press the onion ring into the breadcrumb mixture, pressing lightly to help the coating adhere well and create a crispy exterior.
- Arrange the coated onion rings on the prepared baking sheet, leaving space between each to allow for even baking.
- Lightly spray the onion rings with cooking spray or mist them with oil to help them turn golden and crispy during baking.
- Bake in the oven for 20-25 minutes, flipping them halfway through, until they are deep golden brown and crispy around the edges.
- Remove the onion rings from the oven and let them rest for 2-3 minutes to set the coating and prevent sogginess.
- Serve the baked onion rings immediately with your favorite dipping sauce, like spicy ketchup or ranch, while they’re warm and crispy.
Pro tips for crispy baked onion rings
- coating: Use panko breadcrumbs for an extra airy, crispy exterior that shatters pleasantly with each bite.
- Quick dip: Keep the egg wash thin to avoid soggy coatings; a rapid, even coat ensures crispness.
- Gentle handling: Separate onion rings carefully to prevent tearing, which helps maintain an even, golden crust.
- Light spray: A spritz of oil before baking promotes browning without greasiness; avoid drenching the rings.
- Oven temperature: Keep it steady at 200°C (390°F) to ensure even cooking and a consistent crunch.
- Timing: Bake for 20-25 minutes, flipping halfway; look for a deep golden hue and crispy edges.
- Rest briefly: Let baked onion rings sit for 2 minutes after removing from oven to firm up the coating and prevent sogginess.
Common mistakes and how to fix them
- FORGOT to preheat the oven → Always preheat to 200°C (390°F) before baking.
- DUMPED the onions directly into the coating → Separate rings carefully for even coating.
- OVER-TORCHED the breadcrumbs → Lightly toast for a golden, crispy texture, not dark char.
- SKIPPED the resting step → Rest for 2-3 minutes to set the coating and prevent sogginess.
Fast fixes for common issues
- When oil splatters, splash a bit of water to quiet the crackle and contain the mess.
- If rings stick together, gently separate with a toothpick or skewer before baking.
- Dumped onion rings on a cold baking sheet? Patch with a quick spritz of oil and re-bake for crunch.
- Overcooked? Shield with a quick sprinkle of fresh herbs to refresh flavor and appearance.
- When breadcrumbs burn, swap to fresh panko and adjust oven rack lower for even browning.
Prep, store, and reheat tips
- Prepare onion rings up to a day in advance; keep coated but unbaked in an airtight container in the fridge. The coating stays crisp and fresh.
- Store baked onion rings in a single layer in a container with a paper towel at the bottom for up to 2 days. Reheat in a hot oven or air fryer until crispy, about 5-7 minutes. Expect a fragrant, toasted aroma and crunch restored.
- Freezing cooked rings is possible but may soften the coating. Freeze up to 1 month in a sealed bag. Reheat directly from frozen, adding a few extra minutes for crispness. Slightly softer texture but still flavorful.
- Reheat baked onion rings in a 190°C (375°F) oven or air fryer for best crisping, watching until they shimmer with golden edges and crackle invitingly. Avoid microwaving, as it makes them soggy and limp.
- For best flavor, reheat just before serving. The aroma of toasted breadcrumbs and caramelized onion should waft out, with a satisfying crunch when you bite into them again.
Top questions about baked onion rings
1. Can I use other types of onions?
Use firm, sweet yellow onions for the best flavor and texture. If you prefer a milder taste, shallots work well too.
2. Can I swap the breadcrumbs?
Yes, you can substitute panko with regular bread crumbs, but expect a softer, less airy crunch.
3. How long and at what temperature do I bake them?
Preheat your oven to 200°C (390°F). Bake the rings on a lined sheet for 20-25 minutes, flipping halfway.
4. Do I need to oil the onion rings before baking?
Lightly spray the coated rings with oil before baking. This helps achieve a crispy, golden crust.
5. Can I reheat baked onion rings?
Serve immediately for the best crunch, but you can reheat in the oven or air fryer for 5-7 minutes to restore crispness.
6. Why isn’t my coating sticking?
If the coating isn’t sticking well, make sure the onion rings are dry and coat them quickly while still damp.
7. How much oil should I use?
Use a light hand with the oil spray; too much can make the coating soggy instead of crispy.
8. How can I make these vegan?
For vegan options, skip the egg wash and substitute with a thick plant-based milk or a cornstarch slurry.
9. How do I know when they are done?
Keep an eye on the oven, as oven temperatures can vary. Look for a deep golden color and crackling sound.
10. What if my onion rings stick together?
If the onion rings stick together, gently separate them with a fork before baking to ensure even crisping.
These baked onion rings are a reminder that simple ingredients, when treated right, can turn into something special. The smell of caramelized onions and toasted coating filling the house makes the effort feel worth it. It’s a comfort that’s easy to pull together, yet feels like a little treat every time.
Whenever I make these, I’m reminded that good food doesn’t have to be complicated or greasy. They’re perfect for a casual snack or a relaxed weekend lunch. Plus, they leave the kitchen smelling warm and inviting, a quiet nudge to slow down and enjoy the small moments.