
Growing up, street food stalls in my neighborhood would always have a sizzling tray of vegetable cutlets. They were crispy on the outside, packed with tender, spiced veggies inside, and somehow always made me feel right at home. Making them at home now feels like reconnecting with those fleeting childhood moments, but with a fresh twist and a bit more control over the ingredients.
This recipe isn’t just about nostalgia; it’s about transforming simple, everyday vegetables into something a bit more special. It’s a way to sneak in those healthy bits without sacrificing the satisfying crunch or the savory, aromatic punch that makes street-style cutlets addictive. Plus, they’re easy to customize with what’s in the fridge, making them a practical snack or meal for busy days.
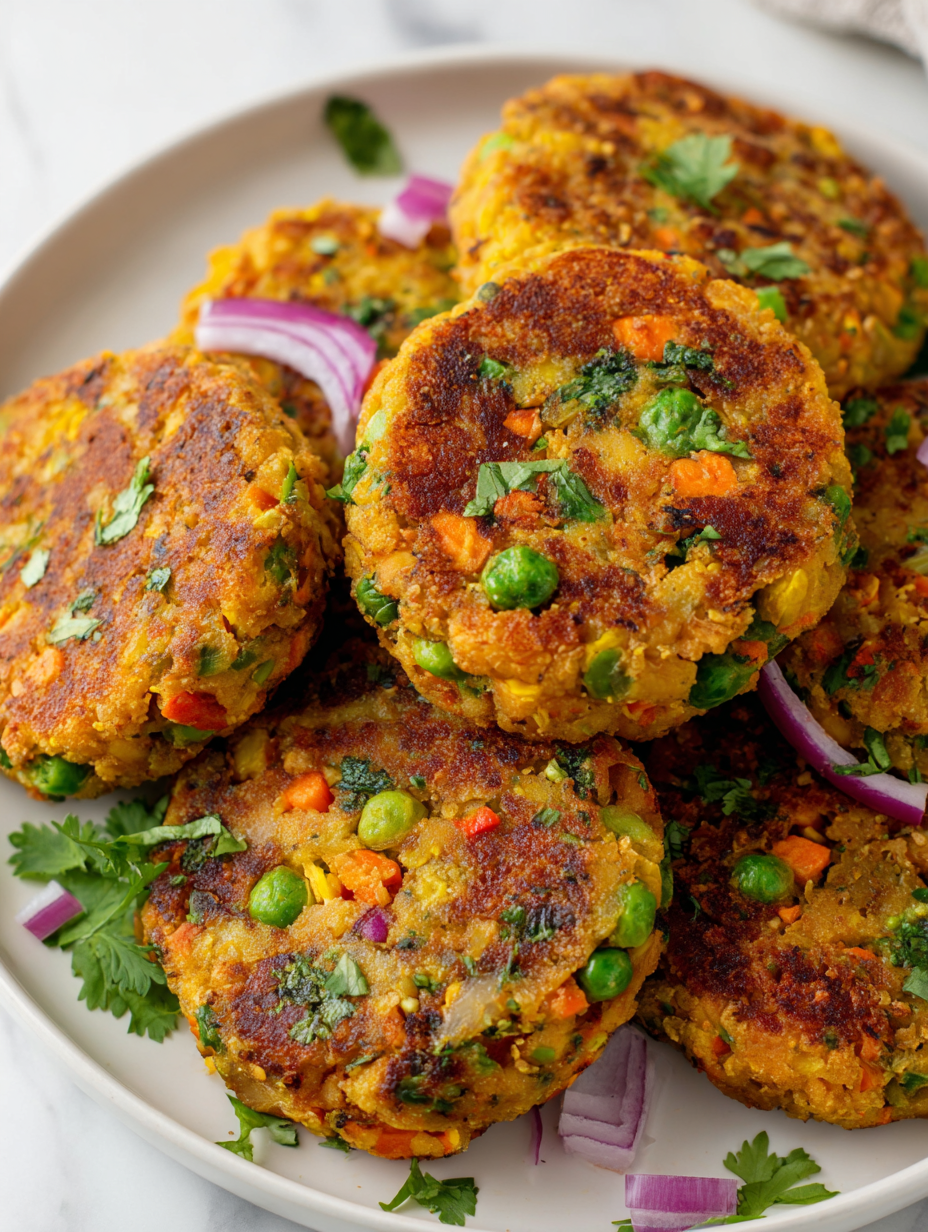
Focusing on the nostalgia of childhood snacks, this vegetable cutlet recipe reimagines a familiar street food with a homemade touch, blending memories with a fresh, veggie-forward twist.
Nostalgic Street Food Twist
- Making these vegetable cutlets takes me straight back to my childhood street food stalls, where the smell of spices and sizzling oil was pure comfort.
- I love how this recipe turns simple vegetables into crispy, flavorful bites that feel indulgent but are actually pretty wholesome.
- There’s a quiet pride in crafting these at home, knowing I can tweak the spices and veggies to make them just right for any mood or season.
- Whenever I fry a batch, I feel a rush of relief—these are quick, satisfying, and somehow always bring everyone to the table.
The inspiration behind this dish
- This recipe for vegetable cutlets came out of a lazy weekend craving something crispy and familiar, but with a twist. I remembered how my grandmother used to fry up veggie patties with whatever was leftover in the fridge—carrots, potatoes, a bit of spinach. That spontaneous, no-fuss approach gave me the guts to experiment with a mix of textures and flavors, aiming for something hearty yet tender inside, crunchy outside.
- One afternoon, I tossed together a batch just to see if I could get that nostalgic street-food vibe at home, crispy and fragrant with cumin and coriander. Turns out, it’s just as satisfying as I remembered, with the bonus of knowing exactly what’s in them. It’s become my fallback snack, especially when I want something quick, nourishing, and a little bit indulgent without the deep-fried guilt.
- heading
- story_type
Historical Roots of Vegetable Cutlets
- Vegetable cutlets have roots in street food vendors across India and Pakistan, where they served as quick, hearty snacks for workers and passersby.
- The concept of turning vegetables into patties or croquettes dates back centuries, with variations appearing in many cultures as a way to make humble produce more appealing.
- In the early 20th century, these cutlets gained popularity in colonial kitchens as a vegetarian alternative to meat patties, blending local spices with imported techniques.
- Modern twists often incorporate global flavors, but the core idea remains a satisfying, veggie-packed bite that’s adaptable to any spice mix or leftover vegetables.
Ingredient breakdown: key components
- Carrots: I like how their natural sweetness turns slightly caramelized and smoky when fried—swap with sweet potatoes if you prefer a softer bite.
- Potatoes: They give the cutlets structure and a mild, comforting flavor, but you can substitute with cooked squash for a lighter feel.
- Onions: Their pungent aroma mellows into a sweet, savory note during cooking; shallots work well if you want a subtler flavor.
- Spices: Cumin and coriander are my go-to, adding warmth and depth; feel free to add a pinch of smoked paprika for a smoky kick.
- Binding agents: I use bread crumbs and a little flour for crunch and stability—ground oats can replace crumbs for a nuttier texture.
- Herbs: Fresh cilantro or parsley brighten up the mix with a fresh, grassy note—dried herbs work in a pinch, but lose some vibrancy.
- Oil: Use neutral oil for frying to keep the flavor clean; a splash of sesame oil can add a fragrant, toasty aroma if you like.
Spotlight on key ingredients
Carrots:
- I love how their natural sweetness caramelizes and develops a smoky note when fried—try sweet potatoes for a softer, earthier touch.
- Potatoes: They give the cutlets structure and a comforting, mild flavor—substitute with cooked squash for a lighter, sweeter variation.
Onions and spices:
- Onions: During cooking, their pungent aroma mellows into a sweet, savory scent—shallots can replace onions for a subtler, milder taste.
- Spices: Cumin and coriander add warmth and depth; a pinch of smoked paprika can introduce a smoky undertone that’s irresistible.
Notes for ingredient swaps
- Dairy-Free: Use mashed bananas or applesauce instead of eggs for binding—less richness, more subtle sweetness.
- Gluten-Free: Swap bread crumbs for ground almonds or gluten-free oats—adds nuttiness but alters crunch slightly.
- Vegan: Replace eggs with mashed tofu or flaxseed slurry—may change the texture to be a bit softer.
- Low-Sodium: Omit or reduce salt, and add a splash of lemon juice or vinegar to boost flavor without saltiness.
- Herb Variations: Use fresh mint or basil instead of cilantro—brings a different, vibrant aroma to the mix.
- Oil Choice: Switch to coconut or sesame oil for frying—introduces different aroma profiles and slight flavor shifts.
- Vegetable Variations: Incorporate finely chopped zucchini or bell peppers—adds moisture and color, but may require a little extra binding.
Equipment & Tools
- Large mixing bowl: Combine and mix the grated vegetables and spices.
- Grater: Shred carrots, potatoes, and onion.
- Frying pan: Cook the cutlets evenly and achieve crispiness.
- Spatula or tongs: Flip and handle the patties safely.
- Paper towels: Drain excess oil after frying.
Step-by-step guide to vegetable cutlets
- Gather all equipment and ingredients. Have a large mixing bowl, a frying pan (about 25 cm / 10 inches), a spoon or spatula, and a plate lined with paper towels ready.
- Peel and finely grate 2 carrots, 2 potatoes, and 1 small onion. Mix them in the bowl until combined. If the mixture feels too wet, sprinkle in a tablespoon of bread crumbs and stir.
- Add 1 teaspoon cumin, 1 teaspoon coriander, a pinch of salt, and a handful of chopped cilantro. Mix thoroughly. The aroma should be warm and fragrant.
- Prepare the binding mixture: in a small bowl, beat 1 egg (if using) or skip for vegan, then add 2 tablespoons flour or ground oats. Combine well.
- Shape the mixture into small, flat patties about 1.5 cm / 0.6 inches thick. Keep them uniform for even cooking.
- Heat about 1 cm / 0.4 inches of neutral oil in the pan over medium heat (about 180°C / 355°F). When it shimmers, it’s ready.
- Fry the cutlets in batches, about 3-4 minutes per side. Cook until golden brown, crispy, and cooked through. Flip carefully to avoid breaking.
- Check the color and smell; they should be uniformly crispy and fragrant with spices. The edges should be crisp, and the inside tender.
- Remove from pan and place on paper towels to drain excess oil. Rest for 2 minutes before serving to help set the shape and prevent sogginess.
- Serve hot with a squeeze of lemon or a side of yogurt or chutney. The crunch and aroma should be irresistible.
Let the cutlets rest for a couple of minutes on a wire rack or paper towels. Serve immediately while crispy and hot, optionally garnished with fresh herbs or a wedge of lemon.
How to Know It’s Done
- Cutlets are golden and crispy on the outside.
- Filling is tender and holds shape when pressed gently.
- Aromatic spices infuse the entire patty without burnt smell.
Vegetable Street-Style Cutlets
Ingredients
Equipment
Method
- Gather all your equipment and ingredients: grate carrots, potatoes, and onion into a large mixing bowl, and chop the cilantro for a fresh burst of flavor.
- Mix the grated vegetables and onion thoroughly, breaking up any clumps so everything is evenly combined.
- Add the cumin, coriander, chopped cilantro, and salt to the bowl. Stir well until the spices are evenly distributed and the aroma is warm and fragrant.
- Sprinkle in the bread crumbs and, if using, pour in the beaten egg. Mix everything together until the mixture feels cohesive and holds together when shaped—it should be slightly sticky but firm.
- Divide the mixture into four equal portions and shape each into flat, round patties about 1.5 cm thick. Keep them uniform for even frying.
- Heat enough neutral oil in a frying pan over medium heat until it shimmers slightly, around 180°C (355°F). You can test it by dropping a small piece of mixture—if it sizzles immediately, the oil is ready.
- Carefully place the patties into the hot oil, cooking in batches to avoid overcrowding. Fry for about 3-4 minutes per side, until they turn a beautiful golden brown and crispy on the outside.
- Use a spatula or tongs to flip the cutlets gently, ensuring they cook evenly and develop a crispy crust. The sizzling sound should slow down and become more gentle as they crisp up.
- Once golden and crispy, transfer the cutlets onto paper towels to drain excess oil. Let them rest for a minute to set their shape and enhance the crunch.
- Serve the hot vegetable cutlets with a squeeze of lemon or a side of yogurt or chutney for added flavor. Enjoy their crispy texture and aromatic spices!
Notes
Pro Tips for Perfect Cutlets
- Bolded mini-head: Use a gentle hand when shaping patties—keep them uniform for even cooking and crispy edges.
- Bolded mini-head: Keep oil at consistent temperature—use a thermometer and fry in small batches to prevent oil temperature drops.
- Bolded mini-head: Incorporate fresh herbs at the end—this preserves their bright aroma and vibrant color.
- Bolded mini-head: Rest fried cutlets briefly on paper towels—this helps set the shape and keeps them crispy longer.
- Bolded mini-head: For a golden crust, don’t overcrowd the pan—fry in batches and maintain a steady heat.
- Bolded mini-head: Add a splash of lemon juice to the mixture—brightens flavors and balances the richness of fried vegetables.
- Bolded mini-head: Use a wide spatula to flip—gently turn the patties to avoid breaking them apart during frying.
Common mistakes and how to fix them
- FORGOT to drain excess oil → Place cutlets on paper towels immediately after frying.
- DUMPED too much spice → Adjust seasoning gradually, taste as you go.
- OVER-TORCHED the edges → Reduce heat if edges darken too quickly, cook more slowly.
- MISSED the resting step → Rest cutlets for 2 minutes for better shape and crunch.
Quick fixes and pantry swaps
- When oil shimmers, gently lower cutlets to avoid splatters and splashes.
- Splash a little water on the pan if the oil starts to smoke excessively.
- Patch a broken cutlet by pressing the edges together and frying a moment longer.
- Shield delicate cutlets with a splatter guard to prevent oil burns.
- Rescue a soggy batch by re-crisping in a hot oven or skillet for a few minutes.
Prep, store, and reheat tips
- Prepare the vegetable mixture and shape the cutlets ahead of time; keep covered in the fridge for up to 24 hours. The flavors meld and the mixture firms up slightly, making shaping easier when ready to cook.
- Cooked and cooled cutlets can be stored in an airtight container in the fridge for up to 3 days. They may lose some crispness, but reheating restores some crunch with a quick fry or oven bake.
- For longer storage, freeze uncooked cutlets on a tray, then transfer to a zip-top bag. They keep well for up to 2 months. Thaw in the fridge before frying.
- Reheat fried cutlets in a hot skillet with a splash of oil for 2-3 minutes per side until crisp and heated through. The aroma of spices should reignite, and the exterior should regain its crunch.
Top questions about vegetable cutlets
1. Should I grate or mash the vegetables?
Use a coarse grater to get the right texture; it creates a nice, chunky bite. Finer grating can make them mushy.
2. Can I make these vegan?
Yes, if you want a vegan version, skip the egg and add a little more binding like ground oats or mashed banana.
3. How hot should the oil be?
A hot oil temperature around 180°C (355°F) gives a crispy, golden crust without burning. Use a thermometer for best results.
4. Why do my cutlets fall apart?
If they fall apart, add a bit more flour or bread crumbs to the mixture and chill it for 10 minutes before shaping again.
5. Can I fry all at once?
Overcrowding the pan cools the oil, leading to soggy cutlets. Fry in batches for crispy, even results.
6. Can I bake these instead of frying?
Yes, baking at 200°C (390°F) for 20-25 minutes is a healthier option, but they won’t be as crispy as fried.
7. Can I use dried herbs?
Use fresh herbs like cilantro or parsley for brightness. Dried herbs work but lose some vibrancy and fresh aroma.
8. Can I serve them cold?
Yes, these taste great at room temperature, making them perfect for picnics or packed lunches. Reheat briefly to crisp up if needed.
9. How can I customize the flavor?
Adjust spices to your taste—more cumin for earthiness or add chili flakes for heat. Taste the mixture before shaping.
10. How should I store and reheat leftovers?
Store leftovers in an airtight container in the fridge for up to 3 days. Reheat in a hot skillet for best crunch.
Revisiting these vegetable cutlets feels like a small act of rebellion against the rush of store-bought snacks. The aroma of spices and the crackle of frying oil still bring a quiet thrill, even after many batches. They’re simple, honest food that reminds me of home, made with a little patience and a lot of love.
In a busy world, these cutlets are a reminder that comfort can be quick, nourishing, and just a little bit nostalgic. They’re perfect for when you want something familiar but fresh, crispy but tender inside. And honestly, they’re one of those recipes that makes the kitchen feel a little more like a cozy corner of the world.