These mini flatbread bites are my go-to for turning a simple snack into something with personality. You can load them up with flavors you love or experiment with unexpected combos—nothing feels too precious. It’s a quick way to serve something warm, crispy, and just a little cheeky, especially when friends drop by or I need a hit of something savory without fuss.
What I really love about them is how flexible they are. Use whatever toppings you’ve got lingering in the fridge or pantry. No rules, just a hot oven, a few toppings, and a moment of chaos that somehow turns into a tiny, perfect bite. It’s honest, unpolished cooking at its best—no stress, just flavor and a little bit of fun.
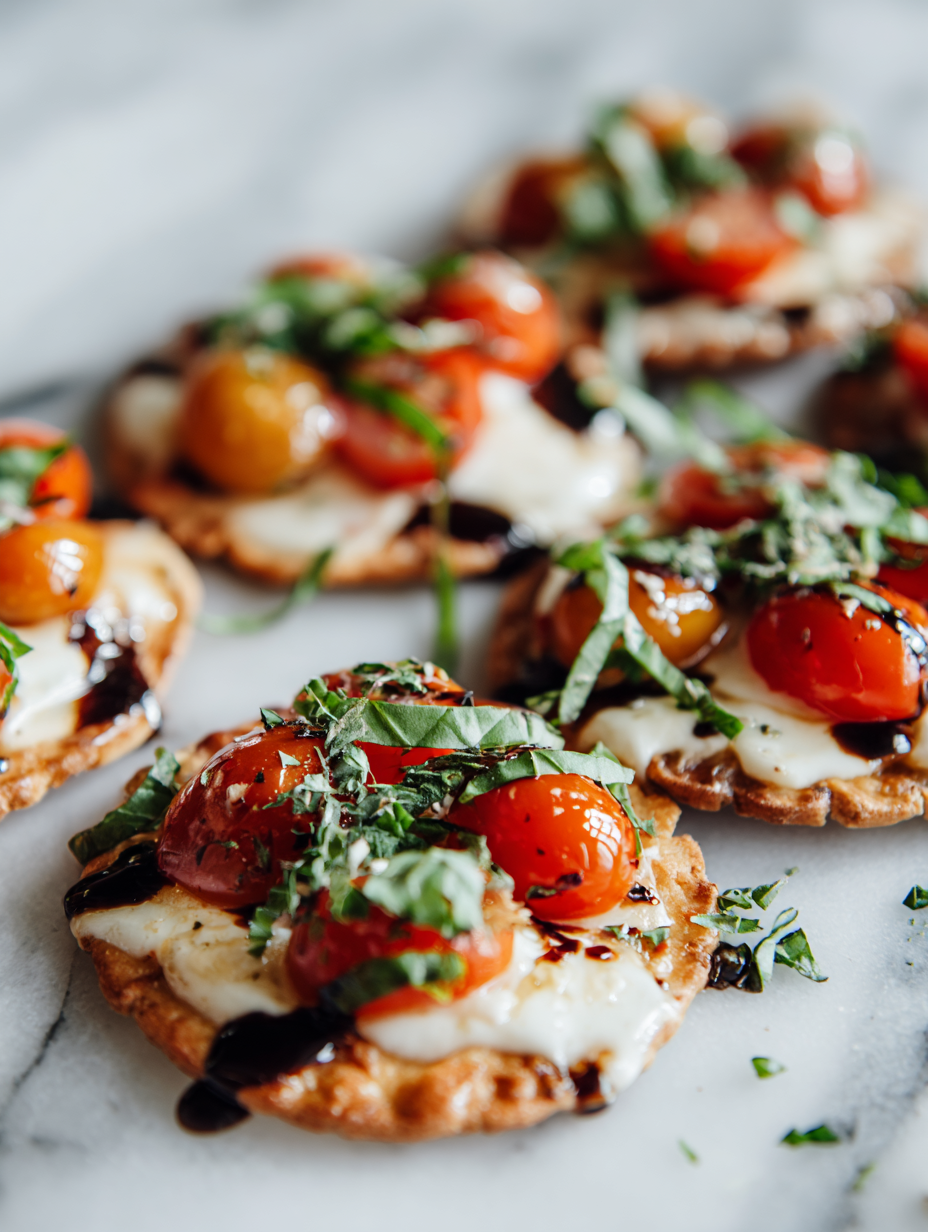
Focusing on the versatility of mini flatbread bites as a blank canvas for unexpected flavor combos, turning a simple snack into a personalized, sharable experience.
Unexpected Flavors on Tiny Breads
- These bites remind me of lazy weekend mornings, where I’d experiment with leftover cheeses and herbs, turning them into tiny treasures.
- I love how a sprinkle of spicy chili flakes can suddenly make these flatbreads feel like a rebellious snack I shouldn’t be eating so late.
- There’s a rush of pride when friends ask for the recipe, not realizing how simple yet addictive they are to make.
- Sometimes, I just crave the crispy, cheesy bites that bring back childhood memories of snack times around the table.
- A chaotic kitchen, a handful of toppings, and suddenly I’ve got a platter of something that feels both spontaneous and satisfying.
The story behind this recipe
This recipe came together one chaotic afternoon when I realized I was out of bread but had some leftover flatbread sitting in the fridge. Instead of letting it go stale, I chopped it into tiny bites, topped them with bits and bobs from my pantry, and baked them quick. The aroma of warm bread mingling with melting cheese and herbs instantly made me remember how I loved turning simple ingredients into little moments of joy. It’s a reminder that sometimes, the best snacks are born from a bit of improvisation and a dash of chaos.
Contextual origin, trivia, or history
- Mini flatbread bites originated in Mediterranean street food markets, where vendors used leftover flatbread to make quick, portable snacks.
- They became popular in modern tapas bars as a versatile base for unexpected flavor pairings, blending rustic charm with gourmet flair.
- Historically, small bread rounds were a practical way to use up stale bread, transforming it into something fresh and appealing.
- This snack echoes ancient traditions of repurposing bread, but with a contemporary twist of customizable toppings and bold flavors.
Ingredient breakdown: key components
- All-purpose flour: I like the neutral base, but if you want a slightly richer flavor, try bread flour for a chewier bite.
- Yeast: It gives the flatbread a subtle lift and chew. Skip it for a quicker, denser version, but the texture will change.
- Olive oil: Brings a fragrant, fruity note and tender crumb. Use good-quality extra virgin for the best aroma and flavor.
- Water: It needs to be warm, not hot, to activate the yeast properly. Too hot and you’ll kill the yeast, too cold and it won’t rise.
- Toppings: I love a mix of cheeses and herbs—think gooey mozzarella and fresh basil—but don’t be afraid to get spicy or smoky with paprika or pepperoni.
- Sea salt: A pinch on top enhances all the flavors and adds a little crunch. Use flaky sea salt for a subtle burst of brine with each bite.
- Optional extras: Garlic, chili flakes, or a drizzle of honey can turn these bites into something unexpected. Use sparingly to balance flavors.
Spotlight on key ingredients
Yeast:
- It activates with warm water, creating tiny bubbles that make the flatbread airy and chewy, with a subtle yeasty aroma that’s inviting.
- During baking, it expands, giving the bread a light, tender texture. A quick proof makes all the difference in rise and chewiness.
Olive Oil:
- It adds a fragrant, fruity aroma and tender crumb, turning simple dough into something richer and more complex. Use good-quality extra virgin for best flavor.
- During baking, it helps the flatbread get a golden, slightly crispy edge. Its aroma intensifies when heated, filling your kitchen with a fresh, herbal scent.
Notes for ingredient swaps
- Dairy-Free: Swap regular cheese for a plant-based alternative. Expect a slightly milder flavor and softer melt.
- Gluten-Free: Use a gluten-free flatbread or wrap. The texture might be a bit more tender or crumbly, but still delicious.
- Vegan: Replace cheese with vegan cheese or omit altogether. You might miss some gooeyness but can add herbs for flavor.
- Olive Oil: Use avocado oil or melted vegan butter for a different aroma and richness. It might alter the flavor slightly.
- Herbs: Fresh herbs like basil or parsley can be swapped for dried, though fresh will give a brighter, more pungent hit.
- Toppings: Feel free to use spicy chorizo or smoky salmon instead of traditional ingredients. Expect bolder, more intense flavors.
- Sea Salt: Kosher or flaky sea salt adds a subtle crunch and briny note. Regular table salt can be used, but use less to avoid overpowering.
Equipment & Tools
- Mixing bowl: Combine dry ingredients and hold dough.
- Dough scraper or rolling pin: Shape the dough into thin circles.
- Baking sheet: Bake the flatbreads evenly.
- Parchment paper: Prevent sticking and make cleanup easier.
- Oven thermometer: Ensure accurate baking temperature.
Step-by-step guide to flatbread bites
- Gather all ingredients and equipment. Preheat your oven to 200°C (390°F).
- Mix 2 cups of all-purpose flour, 1 teaspoon of salt, and 1 teaspoon of dry yeast in a large bowl.
- Add 2 tablespoons of olive oil and 3/4 cup warm water. Stir until a sticky dough forms.
- Knead briefly on a floured surface until smooth, about 2 minutes. Cover with a damp cloth and let rest for 10 minutes.
- Divide dough into 12 equal portions. Roll each into a thin circle about 10 cm (4 inches) in diameter.
- Line a baking sheet with parchment paper. Place flatbreads on the sheet, spacing evenly.
- Bake in the preheated oven for 8-10 minutes, until golden and crispy around the edges.
- While baking, prepare toppings: shred cheese, chop herbs, and set out spicy or smoky extras.
- Once baked, remove flatbreads and let cool for 2 minutes. Top each with your desired toppings.
- Finish with a sprinkle of sea salt or a drizzle of honey if desired. Serve warm or at room temperature.
Let the baked flatbreads cool for 2 minutes before topping. Arrange on a platter and serve immediately for best texture and flavor.
How to Know It’s Done
- Flatbreads are golden and crispy on the edges.
- Toppings are melted or slightly caramelized.
- Flatbreads feel firm but tender when bitten.
Mini Flatbread Bites
Ingredients
Equipment
Method
- In a large mixing bowl, combine the flour, dry yeast, and sea salt until evenly mixed.
- Add the olive oil and warm water to the dry ingredients, then stir with a spoon until a sticky dough begins to form.
- Use your hands or a dough scraper to knead the dough gently in the bowl for about 2 minutes until it becomes smooth and elastic.
- Cover the bowl with a damp cloth and let the dough rest for 10 minutes, allowing it to relax and slightly rise.
- After resting, turn the dough out onto a lightly floured surface and divide it into 12 equal portions.
- Roll each portion into a thin, round circle about 10 cm (4 inches) in diameter, aiming for even thickness.
- Line a baking sheet with parchment paper and arrange the flattened dough rounds evenly spaced apart.
- Bake in a preheated oven at 200°C (390°F) for 8-10 minutes, or until the flatbreads are golden around the edges and crispy.
- While they bake, prepare your toppings—shredded cheese, chopped herbs, chili flakes, or other favorites—so everything is ready to go.
- Once baked and still warm, remove the flatbreads from the oven and let cool for 2 minutes, which helps the toppings melt slightly and enhances flavor.
- Top each flatbread with your chosen toppings, pressing lightly to help them adhere, then finish with a sprinkle of sea salt or a drizzle of honey for extra flavor.
- Serve the mini flatbread bites warm or at room temperature for a crispy, cheesy, and customizable snack experience.
Pro tips for perfect flatbread bites
- Use a hot oven to achieve crispy edges quickly—preheat at least 15 minutes beforehand.
- Roll the dough thin—this ensures they bake evenly and get that satisfying crunch.
- Keep an eye on baking time—8 minutes is usually enough for golden, crispy flatbreads.
- Brush with olive oil before baking for extra flavor and a glossy finish.
- Add toppings just after baking—melts cheese and flavors meld better on a warm base.
- Use a pizza stone if you have one—helps distribute heat evenly for professional-level crispness.
- Don’t overload toppings—less is more to keep flatbreads crispy and manageable.
Common mistakes and how to fix them
- FORGOT to preheat oven → Always preheat for even baking and crispiness.
- DUMPED too much flour → Use measured amounts; excess flour makes flatbread tough.
- OVER-TORCHED edges → Watch closely after 8 minutes; remove when golden and crispy.
- SKIPPED resting dough → Rest for at least 10 minutes to improve elasticity and texture.
Quick fixes and pantry swaps
- When flatbreads crackle and shimmer, they’re perfectly crispy—rescue with a quick 30-second microwave blast.
- If toppings slide off, patch with a light brush of olive oil before baking again.
- Splash a few drops of water on the baking sheet to shield flatbreads from over-torching edges.
- Dumped too much flour? Lightly brush off excess to prevent tough bites.
- When in doubt, pantry swap: use pita bread as a quick stand-in—same crispy, handheld joy.
Prep, store, and reheat tips
- Prepare the dough up to a day in advance; keep covered in the fridge to prevent drying out, and it will be easier to shape when cold.
- Flatbreads can be baked and stored in an airtight container at room temperature for up to 2 hours, maintaining crispness if eaten fresh.
- For longer storage, reheat flatbreads in a 180°C (355°F) oven for 3-4 minutes until warm and crispy—avoid microwave to keep texture.
- Toppings like cheese and herbs are best added just before serving, but cooked flatbreads can be refrigerated for 1-2 days and reheated with a quick oven blast.
- Reheating will revive crispness and aroma; look for a golden glow and listen for a gentle crackle to confirm they’re warmed through.
Top questions about mini flatbread bites
1. How do I pick the right flatbread?
Look for flatbreads that are firm but pliable, not soggy or overly dry. They should feel sturdy enough to hold toppings without tearing.
2. Can I use pre-made flatbread?
Yes, you can use store-bought flatbreads or even pita bread for a quick fix. Just cut them into bite-sized pieces before baking.
3. How do I know when they’re done?
Bake until the edges are golden and crispy, usually about 8-10 minutes at 200°C (390°F). The toppings should be melted and bubbly.
4. My toppings keep sliding off, what do I do?
If toppings slide off, try pressing them gently into the cheese or sauce before baking. Adding a tiny bit more cheese can also help hold everything in place.
5. How do I reheat leftovers?
Reheat in a 180°C (355°F) oven for 3-4 minutes until crispy and warm. Avoid microwaving, which makes them soft and soggy.
6. How should I cut the bites?
Use a sharp knife or pizza cutter to slice flatbreads into small bites. A gentle press ensures clean cuts without squishing toppings.
7. My dough feels too sticky or dry, what now?
If the flatbread dough is too sticky, dust it lightly with flour before rolling. If too dry, add a teaspoon of water and knead briefly.
8. How can I add smoky flavor?
For a smoky flavor, try adding a dash of smoked paprika or a few drops of liquid smoke to the toppings or dough.
9. How do I get crispy edges?
Use a silicone brush to lightly oil the flatbreads before baking. It helps them crisp up nicely and adds a subtle shine.
10. Can I customize toppings?
Feel free to get creative with toppings—think spicy chorizo, caramelized onions, or even a drizzle of honey for a sweet-salty combo.
These mini flatbread bites are a reminder that simple ingredients can become something more with just a little creativity and a hot oven. They’re perfect for spontaneous gatherings or when I want a quick, satisfying snack that feels a bit special. Sometimes, it’s these small, imperfect moments in the kitchen that bring the most genuine joy.
No matter how many toppings or flavor combos you try, the best part is how easy it is to keep coming back to this recipe. It’s flexible, forgiving, and always satisfying—just like good, honest cooking should be. And honestly, that’s what makes them such a handy little secret in my snack arsenal.

Hi, I’m James Whitmore, the creator behind Salt Evangelist. If there is one ingredient I believe deserves more respect, it is salt. Not because it makes food salty, but because it makes food come alive. Salt highlights sweetness, softens bitterness, sharpens acidity, and deepens savoriness. It is not just seasoning. It is transformation.

