I’ve always been a bit skeptical of the idea that you need deep-frying to get that perfect, crispy chicken wing. Turns out, an oven and a good spice rub can do the trick, and without the greasy mess. There’s something satisfying about achieving that crunch without dunking everything in hot oil, especially when you’re trying to keep it a bit healthier but still crave the bite and flavor you love.
This recipe came from a weekend experiment where I wanted wings that felt indulgent but were baked, not fried. I played around with different spice blends and found that a simple, well-seasoned coating can mimic the crispness and flavor of fried wings—plus, they smell incredible baking in the oven. It’s a no-fuss way to get that satisfying bite and smoky aroma that makes wings irresistible.
Focusing on a no-fry, oven-baked approach that mimics deep-fried crispness, using a secret spice rub for an unanticipated flavor boost.
The secret to crispy oven-baked wings
- I used to think wings had to be fried to get that perfect crunch, but this recipe proved me wrong—baking can do it too, and honestly, I prefer the less greasy feel.
- There’s a nostalgia tied to crispy wings from my childhood, but I love how this version keeps that memory alive with a healthier twist and a smoky spice rub.
- The first time I nailed that crisp skin without oil, I felt a small victory—like I cracked the code for easy, satisfying game-day snacks.
- Cooking these wings always reminds me of casual weekends with friends, where the smell alone sparks the kind of anticipation that makes everyone smile.
- Every batch feels like a little experiment—adjusting spices, tweaking oven temps—and each time, I get that joy of discovering something new and delicious.
The story behind this recipe
- This recipe was born out of a lazy weekend craving for crispy wings that didn’t involve deep frying. I remembered how my mom would bake chicken with a simple spice rub, and I wondered if I could replicate that crunch without all the oil. Turns out, a good oven and a bit of patience can give you that satisfying bite, with the added bonus of less mess and more control over the flavor.
- What really stuck with me is how a little experimentation with spices and baking time can change the game. I love how this dish feels like a weekend project that turns into a guaranteed crowd-pleaser. Sometimes, I even double the spice mix just so I can keep munching on the leftovers the next day—cold or reheated, they’re still just as crave-worthy.
- heading
Chicken Wings Origin & Trivia
- Chicken wings as a dish date back to the 1960s in Buffalo, New York, where they were first served at a local tavern.
- The name ‘Buffalo wings’ is tied to the city, but the dish’s popularity skyrocketed in the 1980s with the rise of sports bars and casual dining.
- Originally, wings were considered a less desirable cut of chicken, repurposed into a flavorful snack rather than a main course.
- Over the years, countless variations have emerged—spicy, sweet, smoky, and even vegan alternatives—showing the dish’s versatility.
- Despite being a casual bar snack, chicken wings have become a symbol of communal eating and game-day feasting worldwide.
Key ingredients for crispy wings
- Paprika: I use smoked paprika for that deep, earthy aroma that envelops the wings. Skip it if you prefer a milder, sweeter note.
- Hot sauce: I like a tangy, vinegar-forward hot sauce—like Frank’s—because it soaks into the skin, leaving a spicy, oozy finish. Feel free to swap for sriracha if you want extra garlic punch.
- Chicken wings: I always pick fresh, organic wings with a good amount of skin—crispiness depends on it. Frozen wings can work, but defrost thoroughly first.
- Baking powder: I swear by aluminum-free baking powder—creates that bubbly, crispy exterior. Don’t skip it or your wings won’t get that crunch.
- Salt and pepper: I season generously—think bold, not shy. Use sea salt and freshly cracked pepper for the best flavor punch.
- Spice rub: I mix garlic powder, onion powder, cayenne, and a touch of brown sugar. It’s the secret layer of flavor that makes these wings addictively savory and smoky.
- Oil spray: I use a light spray of neutral oil—like canola or avocado—to help the skin crisp up evenly. Too much and they’ll feel greasy, not crispy.
Spotlight on key ingredients
Paprika, Hot sauce, Chicken wings:
- Paprika: I use smoked paprika for that deep, earthy aroma that envelops the wings. Skip it if you prefer a milder, sweeter note.
- Hot sauce: I like a tangy, vinegar-forward hot sauce—like Frank’s—because it soaks into the skin, leaving a spicy, oozy finish. Feel free to swap for sriracha if you want extra garlic punch.
- Chicken wings: I always pick fresh, organic wings with a good amount of skin—crispiness depends on it. Frozen wings can work, but defrost thoroughly first.
Notes for ingredient swaps
- Dairy-Free: Omit butter in the sauce or marinade. You won’t get that creamy richness, but the wings stay light and dairy-free.
- Sugar Alternatives: Substitute honey or agave for brown sugar. Expect a slightly different sweetness and less caramelization.
- Hot Sauce: Swap Frank’s with sriracha for garlic punch or chipotle sauce for smoky heat. Adjust amount to taste.
- Cooking Oil: Use light olive oil or avocado oil instead of neutral oils. They add subtle flavor and high smoke points.
- Paprika: Use regular sweet paprika if smoked isn’t available. The flavor will be milder, but still vibrant and red.
- Wings: Frozen wings work fine—defrost thoroughly and pat dry for best crispiness. Fresh wings are ideal but not mandatory.
- Baking Powder: Aluminum-free baking powder is best. It creates that bubbly, crispy crust without off-flavors.
Equipment & Tools
- Oven: To bake the wings evenly and achieve crispy skin.
- Baking sheet: To hold the wings during baking, ensuring airflow for crisping.
- Parchment paper or silicone mat: Prevent sticking and make cleanup easier.
- Small bowl: To mix and hold the spice rub.
- Cooling rack or spatula: To flip wings easily and allow excess oil to drain.
- Thermometer: To check internal temperature for doneness.
- Spray bottle: To lightly coat wings with oil for even browning.
Step-by-step guide to crispy wings
- Preheat your oven to 220°C (430°F). Line a baking sheet with parchment or a silicone mat. Set aside.
- Prepare the spice rub: in a small bowl, mix smoked paprika, garlic powder, onion powder, cayenne, brown sugar, salt, and pepper. Set aside.
- Pat chicken wings dry with paper towels. Removing excess moisture helps them crisp up better.
- In a large bowl, toss wings with a tablespoon of baking powder (aluminum-free) to promote crispiness. Coat evenly.
- Spray wings lightly with neutral oil—canola or avocado—to help the skin brown and crisp.
- Generously coat wings with the spice rub, pressing it into the skin so it sticks well.
- Arrange wings on the prepared baking sheet in a single layer, leaving space between each. This prevents steaming.
- Bake for 25-30 minutes, flipping halfway through. Look for golden-brown, crispy skin and a crackling sound from the oven.
- Check for doneness: wings should be crispy, and the internal temp should reach 75°C (165°F). The skin should jiggle slightly when gently shaken.
- If wings aren’t crispy enough, broil on high for 2-3 minutes, watching carefully to avoid burning. They should shimmer with a smoky aroma.
- Remove from oven. Rest for 5 minutes to allow juices to settle and skin to crisp further.
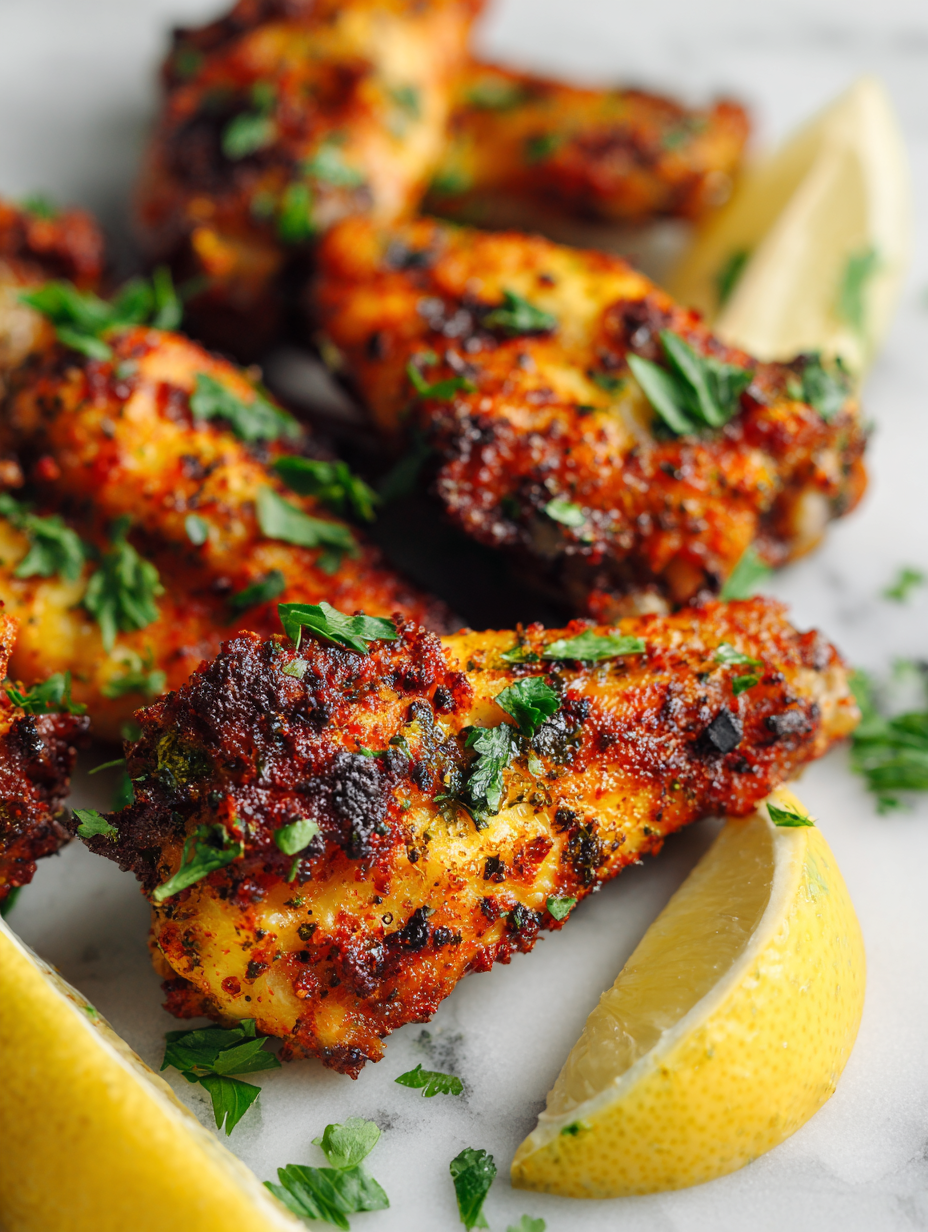
- Serve hot, with your favorite dips or a squeeze of lemon for bright contrast. Plate and enjoy!
Let wings rest on a wire rack or plate for 5 minutes. This keeps them crispy and lets juices redistribute. Serve immediately with your favorite dips or lemon wedges.
How to Know It’s Done
- Skin is golden, crackling, and slightly puffed up with bubbles.
- Internal temperature reaches 75°C (165°F).
- Wings feel firm and crispy to the touch, not limp or soggy.
Oven-Baked Crispy Chicken Wings with Spice Rub
Ingredients
Equipment
Method
- Preheat your oven to 220°C (430°F) and line a baking sheet with parchment paper or a silicone mat. This creates a non-stick surface for your wings.
- In a small bowl, combine smoked paprika, garlic powder, onion powder, cayenne pepper, brown sugar, salt, and black pepper. Mix well until all the spices are evenly distributed.
- Pat the chicken wings dry with paper towels to remove excess moisture, which helps them crisp up in the oven.
- In a large bowl, toss the wings with baking powder, making sure they are coated evenly. This step creates the bubbly crust that mimics fried wings.
- Spray the wings lightly with neutral oil. This adds moisture for browning while preventing excess greasiness.
- Generously sprinkle the spice rub over the wings, pressing it into the skin to ensure it sticks and flavors the meat.
- Arrange the wings in a single layer on the prepared baking sheet, leaving space between each for air circulation.
- Bake the wings for 25 to 30 minutes, flipping them halfway through, until they are golden brown and crispy with bubbling skin.
- Check the internal temperature with a thermometer; it should reach 75°C (165°F). For extra crispness, broil on high for 2-3 minutes, watching carefully to prevent burning.
- Once done, toss the hot wings with hot sauce for a spicy glaze or serve as-is. Let them rest for 5 minutes to allow the skin to set and juices to redistribute.
- Serve the wings hot, with your favorite dips or a squeeze of lemon, and enjoy their crispy, smoky goodness!
Pro tips for crispy oven wings
- Bolded mini-head: Use a light spray of oil → Helps wings get crispy without excess greasiness.
- Bolded mini-head: Pat wings dry thoroughly → Ensures maximum crispness and prevents steaming in the oven.
- Bolded mini-head: Flip wings halfway → Promotes even browning and crisp exterior on all sides.
- Bolded mini-head: Broil at the end → Boosts crispiness and adds a smoky finish quickly, watch closely.
- Bolded mini-head: Check internal temp → Use a thermometer to confirm 75°C (165°F) for safe, juicy wings.
- Bolded mini-head: Rest wings before serving → Keeps juices in and skin crispy, avoiding sogginess.
- Bolded mini-head: Adjust baking time → If wings aren’t crispy, extend baking or broil briefly, but monitor closely.
Common mistakes and how to fix them
- FORGOT to check oven temperature → Use an oven thermometer for accuracy.
- DUMPED in too much oil → Lightly spray or brush for even crispness, avoid greasiness.
- OVER-TORCHED wings → Reduce broil time and monitor closely to prevent burning.
- MISSED resting time → Let wings rest 5 minutes before serving for juiciness and crispness.
Quick fixes and pantry swaps
- When wings aren’t crispy enough, splash a little more oil and broil briefly.
- If wings stick to the pan, patch with parchment paper for easier removal.
- DUMPED in too much sauce? Shake off excess to avoid sogginess.
- When wings smell burnt, shield with foil and reduce broil time by half.
- heading
Prep, store, and reheat tips
- You can prep the spice rub and toss the wings with baking powder a day in advance. Keep covered in the fridge; the flavors meld and the wings dry out slightly, which helps with crispness.
- Stored cooked wings in an airtight container in the fridge will stay good for up to 3 days. The skin might soften slightly, but a quick broil will revive the crispness and add a smoky aroma.
- Reheat wings in a hot oven (around 190°C/375°F) for 10-12 minutes until sizzling and crispy again. Look for a crackling sound and a fragrant smoky scent as signs they’re ready.
- Avoid freezing cooked wings if you plan to reheat for the best texture—freezing can make the skin soggy. If freezing, do so immediately and reheat directly from frozen, adding 5 minutes to baking time.
- For leftovers, reheating in a skillet over medium heat with a light spray of oil can restore some of the original crunch. Monitor the crackling sound and smell for doneness.
Top questions about chicken wings
1. How can I tell if chicken wings are fresh?
Look for wings with bright, firm skin and no sour or off smells. Fresh wings should feel slightly moist but not slimy.
2. Can I use frozen chicken wings?
Yes, frozen wings work well. Defrost thoroughly in the fridge overnight and pat dry before baking.
3. How do I know when the wings are cooked through?
Use a meat thermometer to ensure internal temp hits 75°C (165°F). The skin should be crispy, and juices run clear.
4. Why use baking powder in wings?
Baking powder helps create a bubbly, crispy crust. Aluminum-free is best; skip it at your peril for crunch.
5. How can I make the wings milder or spicier?
Adjust spice levels by adding more cayenne or hot sauce. For milder flavor, reduce or skip the cayenne and use milder hot sauce.
6. Can I broil the wings for extra crispness?
Broil for 2-3 minutes at the end to boost crispiness. Watch carefully so they don’t burn or turn bitter.
7. How do I reheat leftovers without losing crispness?
Reheat wings in a hot oven for 10-12 minutes. For a fresh-crisp finish, spray lightly with oil before baking.
8. Should I rest the wings after baking?
Use a wire rack to rest the wings—this prevents sogginess and keeps the skin crispy while juices settle.
9. What if my wings aren’t crispy enough?
If wings are soggy, increase oven temp slightly or broil briefly. For extra smoky flavor, add a pinch of smoked paprika.
10. Can I make baked wings healthier?
For a healthier version, skip the oil spray and bake at a slightly lower temp, but expect a softer skin.
These wings are not just a snack; they’re a reminder that simple techniques and honest ingredients can deliver real satisfaction. Each bite carries a smoky aroma and a crispy snap that’s hard to beat, especially when you’re craving comfort food with less fuss.
In a season when gathering feels more meaningful than ever, these baked wings bring a little joy to the table—no deep fryer needed. They’re perfect for a laid-back weekend or a spontaneous get-together, leaving behind the greasy mess for good. Just good, honest, crave-worthy wings that keep you coming back for more.

Hi, I’m James Whitmore, the creator behind Salt Evangelist. If there is one ingredient I believe deserves more respect, it is salt. Not because it makes food salty, but because it makes food come alive. Salt highlights sweetness, softens bitterness, sharpens acidity, and deepens savoriness. It is not just seasoning. It is transformation.

