
Making chicken nuggets at home might seem like a small thing, but there’s something incredibly satisfying about transforming simple ingredients into that perfect crispy bite. I’ve always believed that comfort food should be accessible, and these nuggets prove you don’t need fancy ingredients or a deep fryer to get crisp perfection. It’s about focusing on the process, feeling that crackle, and tasting the juicy, tender chicken inside.
This recipe is a bit of a love letter to childhood favorites, but with a twist of my own. I like to keep the crust super straightforward—just five ingredients—so you really taste the chicken, and the process feels honest. Plus, it’s a chance to get a little messy in the kitchen, which is sometimes the best part, especially when everyone’s gathered around, waiting for that first crispy bite.
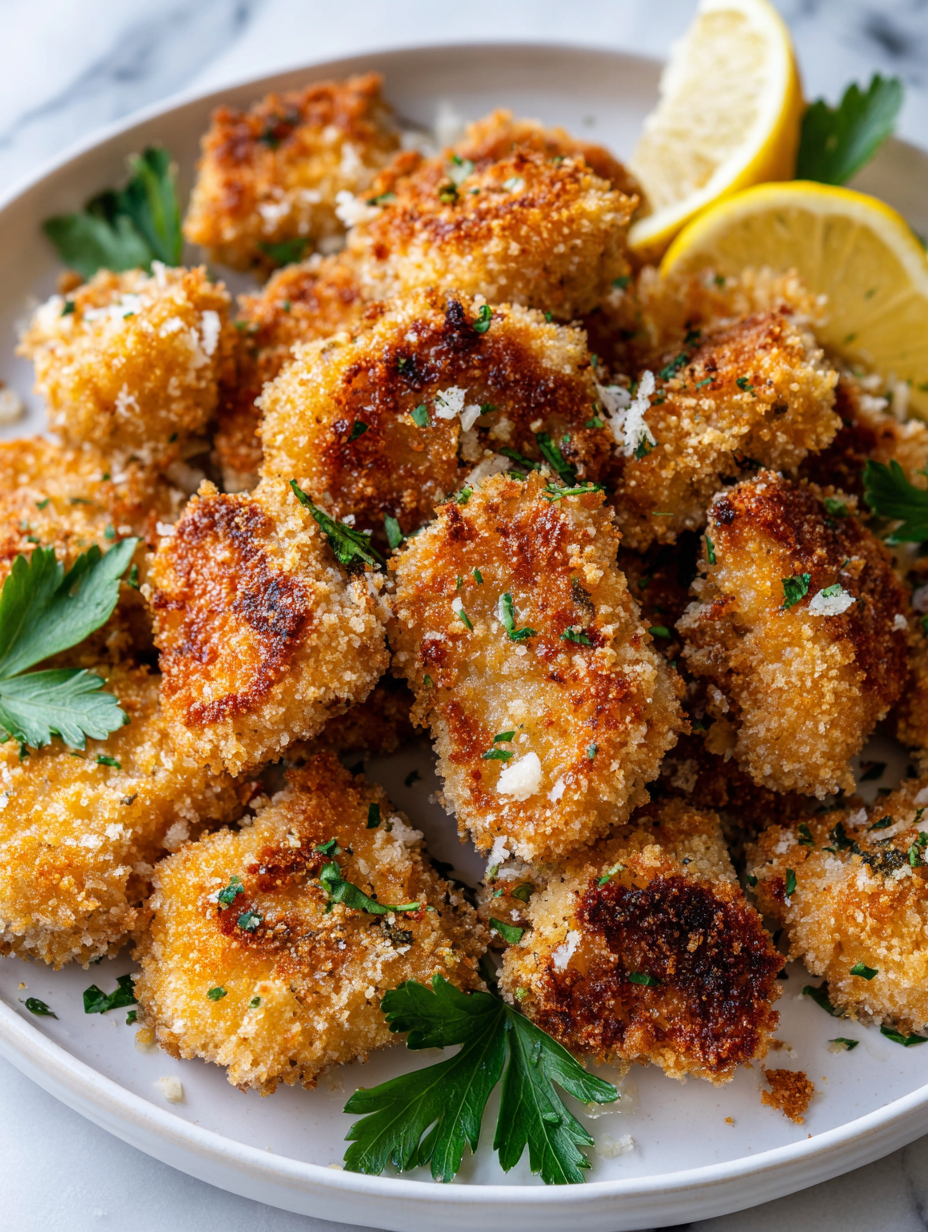
Focusing on crafting homemade chicken nuggets using a simple, five-ingredient crust that transforms everyday chicken into a crispy, crave-worthy snack, emphasizing the satisfaction of making comfort food from scratch.
Rediscovering Childhood Comfort
- Making these nuggets always takes me back to lazy weekend afternoons in my kid’s kitchen, the smell of frying chicken filling the air.
- There’s a quiet pride in creating something so simple yet addictive, especially when I see my kids devour them with messy fingers.
- Sometimes, I feel a rush of nostalgia, remembering how my grandma’s kitchen smelled of crispy chicken and seasoned flour.
- I get a little thrill from perfecting that golden crust—knowing I nailed the texture makes me feel accomplished.
The story behind this recipe
- Making these chicken nuggets started as a way to reclaim a childhood favorite without relying on store-bought frozen versions. I remember the smell of crispy chicken wafting through my mom’s kitchen, that unmistakable sizzle of oil and seasoned flour. Trying to recreate that at home felt like a small act of rebellion against the overly processed snacks we relied on too often.
- What really pushed me was the idea that homemade comfort food can be simple and still deeply satisfying. I wanted something straightforward, with honest ingredients, that you could throw together quickly but still get that perfect crunch. The joy comes from knowing exactly what’s in it, and the messy, crispy process that makes every bite worth it.
- heading: ‘The story behind this recipe’
Nuggets’ Surprising History
- Chicken nuggets as we know them originated in the 1950s, quickly becoming a fast-food staple across America.
- Early recipes were often fried in beef tallow—quite different from the vegetable oils we use today.
- The concept of breaded chicken bites was inspired by traditional European schnitzel, adapted into a kid-friendly finger food.
- Mass-produced nuggets gained popularity in the ’80s, but homemade versions have seen a nostalgic revival among food enthusiasts.
Key Ingredients & Tips
- Chicken breasts: I lean on boneless, skinless breasts—they’re juicy and tender when cooked right. Swap with thighs if you prefer richer flavor, but watch for extra moisture.
- Flour: I use all-purpose flour for the crust, which gives that satisfying crunch. For a gluten-free version, rice flour works well, though it’s slightly lighter.
- Eggs: They act as the glue, keeping the crust intact. If you’re out, a splash of buttermilk can do the trick, adding a subtle tang.
- Breadcrumbs: I prefer panko for that airy, crispy texture, but regular breadcrumbs work too—just not as light and flaky.
- Seasonings: Salt, pepper, and a pinch of paprika—nothing fancy. But a dash of garlic powder or cayenne adds a smoky kick that makes everything pop.
- Oil: I opt for neutral oils like vegetable or canola for frying—hot enough (around 180°C/356°F) until you hear that crackle. Keep a close eye to avoid burning.
- Optional add-ins: A sprinkle of Parmesan into the crust adds umami, but be careful—it can overpower if you add too much.
Spotlight on key ingredients
Chicken breasts:
- I prefer boneless, skinless breasts—they’re juicy and tender when cooked right. Swap with thighs if you prefer richer flavor, but watch for extra moisture.
- Flour: I use all-purpose flour for the crust, which gives that satisfying crunch. For a gluten-free version, rice flour works well, though it’s slightly lighter.
- Eggs: They act as the glue, keeping the crust intact. If you’re out, a splash of buttermilk can do the trick, adding a subtle tang.
Breadcrumbs:
- I prefer panko for that airy, crispy texture, but regular breadcrumbs work too—just not as light and flaky.
- Seasonings: Salt, pepper, and a pinch of paprika—nothing fancy. But a dash of garlic powder or cayenne adds a smoky kick that makes everything pop.
- Oil: I opt for neutral oils like vegetable or canola for frying—hot enough (around 180°C/356°F) until you hear that crackle. Keep a close eye to avoid burning.
Notes for ingredient swaps
- Chicken Breast: I prefer boneless, skinless breasts—they’re juicy and cook evenly. Swap with thighs if you want richer flavor, but keep in mind they may release more moisture.
- Flour: All-purpose flour is my go-to for crust adhesion. For a gluten-free option, try rice flour—lighter but still crispy.
- Eggs: They act as the binder. Out? A splash of milk or buttermilk can replace eggs, adding a slight tang and tenderness.
- Breadcrumbs: Panko gives that airy crunch I love. If you only have regular breadcrumbs, toast them slightly first for extra crispness.
- Seasonings: I stick with salt, pepper, and paprika. For a smoky edge, add a pinch of cayenne or garlic powder—adjust to taste.
- Oil: Neutral oils like vegetable or canola work best. If you prefer a milder scent, these don’t overpower the chicken’s natural smell.
- Optional Add-ins: Parmesan cheese adds umami, but go easy—too much can make the crust greasy or overpower the chicken.
Equipment & Tools
- Shallow bowls: Dredging stations for flour, egg, and breadcrumbs.
- Large skillet or pot: Frying the nuggets evenly.
- Thermometer: Checking oil and internal chicken temperature.
- Tongs: Handling hot nuggets safely.
- Slotted spoon: Removing nuggets from hot oil.
Step-by-step guide to crispy chicken nuggets
- Equipment & Tools: Get a shallow bowl for flour, a second bowl for beaten eggs, a third for breadcrumbs. Use a large plate for resting cooked nuggets. Have tongs, a slotted spoon, and a thermometer ready.
- Cut chicken breasts into 1.5-inch pieces. Pat dry with paper towels. This helps the crust stick better.
- Set up your dredging station: flour in one bowl, eggs beaten in another, breadcrumbs seasoned with salt, pepper, paprika in the third.
- Dip each piece of chicken into the flour, shake off excess. Then dip into the egg, letting excess drip off.
- Coat chicken thoroughly in seasoned breadcrumbs, pressing gently so crumbs adhere. Place on a plate as you go.
- Heat about 2 inches of oil in a large, heavy-bottomed skillet or pot to 180°C (356°F). Use a thermometer to check temperature.
- Fry nuggets in batches, don’t overcrowd. Cook for about 3–4 minutes, turning occasionally, until golden brown and crispy.
- Check for doneness: Nuggets should be golden, crispy, and the internal temperature should reach 75°C (165°F). The juices should run clear when pierced.
- Remove with a slotted spoon, drain on paper towels, and let rest for 1–2 minutes before serving.
- Finish with a sprinkle of flaky sea salt and serve hot with your favorite dipping sauce.
- Resting & Finishing: Let the nuggets rest briefly on a wire rack to keep them crispy. Serve immediately for the best crunch.
- Checkpoints & How to Know It’s Done: Nuggets are golden and crispy; internal temp hits 75°C (165°F); they crackle when bitten into.
Drain nuggets on paper towels or a wire rack. Serve immediately with dipping sauces. Rest briefly to maintain crispness before plating.
How to Know It’s Done
- Golden color and crackle sound when biting.
- Internal temperature reaches 75°C (165°F).
- Nuggets feel firm and not greasy.
Homemade Crispy Chicken Nuggets
Ingredients
Equipment
Method
- Begin by patting the chicken breasts dry with paper towels, then cut them into 1.5-inch bite-sized pieces. This helps the crust stick better and ensures even cooking.
- Set up your dredging station with three shallow bowls: one with flour, another with beaten eggs, and the third with panko breadcrumbs mixed with salt and paprika for flavor.
- Dredge each piece of chicken first in the flour, shaking off any excess, then dip into the beaten eggs, allowing any excess to drip off.
- Press each coated chicken piece into the seasoned panko breadcrumbs, ensuring an even, light coating. Place the breaded nuggets on a plate as you go.
- Pour enough oil into a large skillet or pot to reach about 2 inches deep, and heat over medium-high heat until it reaches 180°C (356°F). Use a thermometer to monitor the temperature.
- Carefully add a few nuggets into the hot oil, ensuring not to overcrowd the pan. Fry for 3 to 4 minutes, turning occasionally with tongs until they are golden brown and crispy.
- Use a slotted spoon to remove the cooked nuggets and transfer them to a paper towel-lined plate or wire rack to drain excess oil. Repeat with remaining nuggets.
- Let the nuggets rest for 1-2 minutes to maintain their crispness, then sprinkle with a little extra salt if desired.
- Serve your homemade crispy chicken nuggets hot with your favorite dipping sauces, enjoying that irresistible crunch with juicy, tender chicken inside.
Pro tips for perfect nuggets
- Bolded mini-head: Use cold oil for frying → Keeps nuggets crispy and prevents sogginess.
- Bolded mini-head: Keep oil at a steady 180°C (356°F) → Use a thermometer to avoid burning or undercooking.
- Bolded mini-head: Don’t overcrowd the pan → Fry in small batches for even crispness and golden color.
- Bolded mini-head: Rest cooked nuggets on a wire rack → Maintains crunch by avoiding steam buildup.
- Bolded mini-head: Season breadcrumbs generously → Adds flavor without overpowering the crispy texture.
- Bolded mini-head: Use panko breadcrumbs for maximum airy crunch → Skip finer breadcrumbs for best texture.
- Bolded mini-head: Handle hot oil carefully → Use tongs for turning nuggets, keep a close eye for splatters.
Common mistakes and how to fix them
- FORGOT to preheat oil → Always heat oil to 180°C (356°F) before frying.
- DUMPED in too many nuggets → Fry in small batches to prevent crowding and sogginess.
- OVER-TORCHED the crust → Keep an eye on oil temperature; reduce heat if crust darkens too fast.
- MISSED resting time → Let nuggets rest on a wire rack for 1-2 minutes to maintain crispness.
Quick fixes and pantry swaps
- When oil shimmers, splash a tiny bit of water to check heat—listen for a crackle.
- If nuggets stick together, gently separate them with tongs during frying.
- Splash a pinch of baking soda into hot oil for a quick rescue if oil smokes excessively.
- Patch soggy nuggets by re-crisping in a 200°C (392°F) oven for 3–5 minutes.
- Shield delicate nuggets from splatters by using a splatter guard or lid during frying.
Prep, store, and reheat tips
- Prep the chicken and breading stations up to a day ahead. Keep components covered in the fridge to prevent drying out. The raw chicken stays fresh for 1-2 days, and crispy crust components can be assembled just before frying for maximum crunch.
- You can freeze uncooked nuggets in a single layer on a baking sheet for 1-2 hours, then transfer to an airtight container or zip-top bag. They keep well for up to 3 months. Thaw in the fridge before frying, or fry straight from frozen, adding an extra minute or two.
- Cooked nuggets are best enjoyed fresh but can be stored in an airtight container in the fridge for up to 2 days. Reheat in an oven or toaster oven at 180°C (356°F) for 5-7 minutes until warmed and crispy, with a satisfying crackle under your bite.
- Reheating in the microwave isn’t recommended if you want crispness, as they tend to turn soggy. The oven or air fryer will revive that crunch, and the aroma of fried chicken will still make your kitchen smell like a small fry shop.
Top questions about chicken nuggets
1. Can I use frozen chicken for nuggets?
Use fresh chicken breasts for juiciness and ease of cutting. Frozen can work if fully thawed, but fresh gives a better texture.
2. How do I know when the oil is ready?
Preheat your oil to 180°C (356°F). If the oil isn’t hot enough, nuggets will absorb more oil and turn greasy.
3. Why are my nuggets soggy or greasy?
Cook nuggets in small batches to prevent overcrowding, which causes uneven frying and soggy crust.
4. How do I tell when the nuggets are done?
Fry until golden brown, crispy, and the internal temp reaches 75°C (165°F). They should crackle when bitten into.
5. Can I use regular breadcrumbs instead of panko?
Use panko breadcrumbs for a light, airy crunch. Regular breadcrumbs can work but won’t be as crispy.
6. Can I bake these instead of frying?
Yes, you can bake the nuggets at 200°C (392°F) for about 15–20 minutes, flipping halfway, for a less greasy option.
7. How long can I keep leftovers?
Store cooked nuggets in an airtight container in the fridge for up to 2 days. Reheat in the oven for best crispness.
8. Can I freeze chicken nuggets?
Yes, you can freeze uncooked nuggets for up to 3 months. Fry directly from frozen, adding an extra minute or two.
9. How do I handle hot oil safely?
Use tongs or a slotted spoon to handle hot nuggets carefully. Be mindful of oil splatters; a splatter guard helps.
10. What if the oil starts to smoke?
If your oil smokes, reduce heat or add a small pinch of baking soda to calm the smoke temporarily.
Making these homemade chicken nuggets is a small act of rebellion against the overly processed snacks we rely on. The smell of crispy chicken filling the air, that satisfying crackle with each bite—that’s what makes it worth the effort.
In the end, it’s about reconnecting with simple ingredients and honest cooking. These nuggets remind me that comfort food from scratch can be straightforward, messy, and deeply satisfying—exactly how food should be.