Cheese balls have this way of conjuring up childhood memories—those messy kitchen counters, the tangy punch of sharp cheddar, and that crispy, golden crust. But lately, I’ve been playing around with a modern twist—adding a tiny squeeze of lemon or a sprinkle of fresh herbs—that keeps the cozy vibe but brightens it up just enough for grown-up tastes.
There’s something about rolling cheese into little perfect spheres that feels a bit rebellious, like reclaiming a simple pleasure we often overlook. I love how easy they are to customize—spicy, smoky, or plain—and how they turn a casual snack into a real conversation starter. Plus, they’re just as good warm fresh out of the oven as they are chilled from the fridge, which makes them perfect for any kind of gathering, big or small.
Focusing on the nostalgic comfort of cheese balls, but with a modern twist that balances richness with a hint of freshness, making it perfect for casual gatherings or cozy nights.
Nostalgic bites with a modern twist
- Making cheese balls always takes me back to family gatherings, the smell of melted cheese filling the air and kids fighting over the last one.
- I love how a simple mixture of cheese and spices can turn into something so addictive—it’s chaos in the best way, rolling and shaping them.
- There’s a quiet satisfaction in seeing these little spheres crisp up perfectly—golden, crackling, with that irresistible cheesy aroma.
- Every time I make cheese balls, I feel a rush of pride, like I’ve captured a moment of nostalgic comfort and made it my own.
The story behind this recipe
- Making cheese balls always felt like a playful act—something about rolling and shaping that brings out my inner kid. One day, I was experimenting with different cheeses, trying to find that perfect balance of meltiness and flavor, and I realized how nostalgic this snack is. It’s like capturing a moment of childhood comfort but with a little grown-up flair—adding herbs, a splash of lemon, or smoky paprika just to brighten things up.
- This recipe was born from a lazy weekend afternoon when I wanted something cozy but a bit special for a casual gathering. I love how adaptable they are—spicy, herby, or plain—and how they turn a simple snack into a conversation starter. They’re equally good warm and gooey or chilled and firm, making them perfect for any mood or moment.
- heading: ‘The story behind this recipe’
Cheese Balls Trivia
- Cheese balls originated in mid-20th century America, initially as a simple party snack.
- They gained popularity in the 1950s, often featured at potlucks and holiday gatherings, embodying post-war optimism.
- The concept of shaping cheese into spheres probably comes from traditional appetizers like canapés and finger foods.
- Variations of cheese balls exist worldwide—each culture adding its own herbs, spices, or coatings for local flair.
Key Ingredients Breakdown
- Cream cheese: I love how it becomes creamy and velvety when softened, making the mixture smooth and easy to shape—just watch out for lumps, so soften it properly.
- Cheddar cheese: Sharp and gooey, it melts beautifully, giving the balls a rich flavor. For a milder taste, swap with Monterey Jack or mozzarella, but keep an eye on melting quality.
- Breadcrumbs: I use plain panko for extra crunch, but if you want a softer crust, regular breadcrumbs work fine—just toast them lightly for flavor.
- Herbs and spices: Fresh parsley or chives brighten up the mix with a fresh, herbaceous punch—add more if you love green, or skip for simplicity.
- Lemon juice: Adds a subtle brightness to cut through the richness—use a squeeze of fresh lemon for zing, but if you prefer milder, a splash of vinegar works too.
- Egg: Binds everything together, ensuring the balls hold their shape. If you want to skip eggs, a bit of mayonnaise or Greek yogurt can help with binding.
- Oil for frying: Use neutral oil like vegetable or canola for crisping—keep the temperature steady at about 180°C/350°F for that perfect golden crackle.
Spotlight on Key Ingredients
Cream cheese:
- I love how it melts into a silky, velvety base—watch for lumps, soften it well before mixing.
- Cheddar cheese: Sharp and gooey, it melts beautifully, giving the balls a rich, savory punch—try Monterey Jack for milder, meltier results.
Cheddar cheese:
- Sharp and gooey, it melts beautifully, giving the balls a rich, savory punch—try Monterey Jack for milder, meltier results.
- Breadcrumbs: I use panko for extra crunch, but regular breadcrumbs toasted lightly add a softer, golden crust—watch for uneven browning.
Notes for ingredient swaps
- Dairy-Free: Swap cream cheese for coconut cream or cashew cheese—loses some tang but keeps creaminess.
- Cheddar Alternatives: Use Monterey Jack or mozzarella for milder, meltier results—less sharp, softer flavor.
- Breadcrumbs: Panko gives extra crunch, but regular breadcrumbs work fine; toast them lightly for flavor.
- Herbs and Spices: Fresh herbs like parsley or chives brighten the mix—dried herbs are okay, but less vibrant.
- Lemon Juice: Adds brightness; swap with a splash of vinegar or a squeeze of lime if needed.
- Egg: Binds the mixture; mayonnaise or Greek yogurt can replace eggs for a softer, tangy crust.
- Oil for Frying: Use vegetable or canola oil—neutral flavor, steady heat, and crispy finish.
Equipment & Tools
- Mixing bowl: Combine ingredients evenly.
- Sturdy spoon or spatula: Mix and fold the cheese mixture.
- Small plate or shallow dish: Hold breadcrumbs for coating.
- Baking sheet: Arrange shaped balls before frying.
- Thermometer: Maintain oil at correct frying temperature.
- Deep skillet or heavy pan: Fry the cheese balls safely.
- Slotted spoon: Remove fried balls from oil.
Step-by-step guide to cheese balls
- Equipment & Tools: Gather a mixing bowl, a sturdy spoon or spatula, a small plate for coating, a baking sheet, and a thermometer for oil temperature.
- Soften the cream cheese: Leave it out at room temperature for about 30 minutes until it’s soft and spreadable. Use a fork or spatula to mash it smooth.
- Mix the base: In the bowl, combine softened cream cheese, grated cheddar, chopped herbs, lemon juice, and a pinch of salt. Stir until well integrated, creamy, and slightly fluffy—about 2-3 minutes.
- Shape the cheese balls: Using your hands or a small scoop, roll the mixture into roughly 1.5-inch spheres. Place on a tray lined with parchment. If the mixture’s too sticky, chill it for 10 minutes.
- Prepare for frying: Pour oil into a deep pan or heavy skillet, enough to submerge the balls. Heat over medium-high until it reaches 180°C/350°F. Use a thermometer for accuracy.
- Coat the balls: Roll each sphere in breadcrumbs, pressing gently to adhere. For a crispier crust, double coat by dipping in beaten egg then breadcrumbs again.
- Fry in batches: Carefully lower cheese balls into hot oil. Fry for 3-4 minutes, turning occasionally, until they’re golden brown and crispy—listen for a crackling sound and watch for even color.
- Check for doneness: The exterior should be deep golden, and the interior should be melty and oozy when cut. The oil temperature should stay steady at 180°C/350°F.
- Drain and rest: Use a slotted spoon to remove the cheese balls. Drain on paper towels for 1-2 minutes. Serve immediately or let cool slightly before plating.
Let the cheese balls rest on paper towels for a minute to drain excess oil. Serve warm, with optional dips or garnishes. For a less messy presentation, skewer with toothpicks or plate directly on a platter.
How to Know It’s Done
- Golden, crispy exterior with even coloration.
- Internal temperature reaches about 70°C/160°F for melty cheese.
- Cheese inside is gooey and fragrant with cheese aroma.
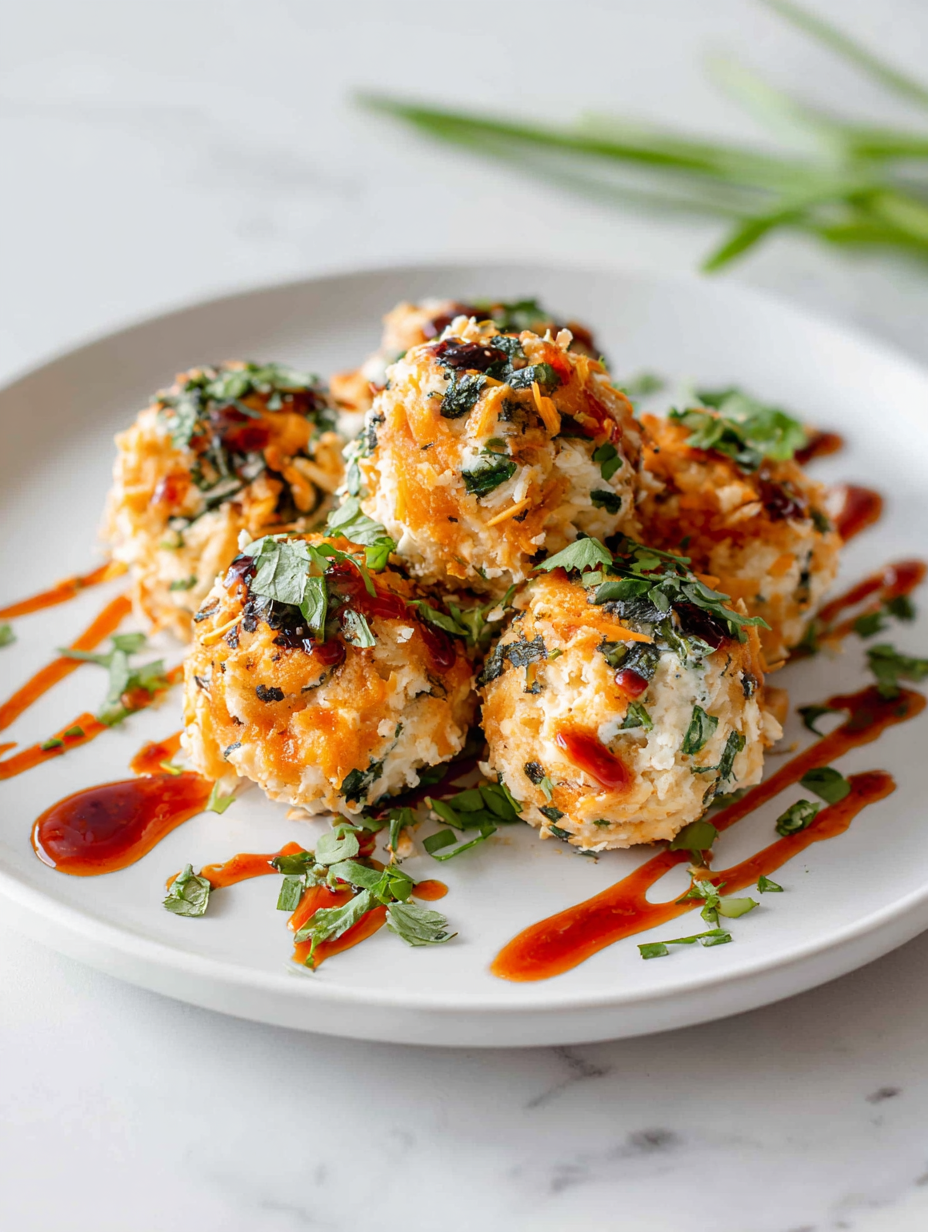
Cheese Balls with a Modern Twist
Ingredients
Equipment
Method
- Place softened cream cheese in a mixing bowl and mash it until smooth, ensuring no lumps remain.
- Add shredded cheddar, chopped herbs, and lemon juice to the cream cheese. Mix everything together until the mixture is creamy, well combined, and slightly fluffy, about 2-3 minutes.
- Using your hands or a small scoop, shape the mixture into 1.5-inch spheres. Place them on a parchment-lined tray. If the mixture feels too sticky, chill it in the fridge for 10 minutes to firm up.
- Pour oil into a deep skillet or heavy pan, enough to fully submerge the balls. Heat the oil over medium-high heat until it reaches 180°C/350°F, using a thermometer to check.
- Place the breadcrumbs on a small plate. Dip each cheese ball into the beaten egg, then roll it in the breadcrumbs, pressing gently to adhere for a crispy crust. For an extra crunch, double coat by repeating the egg dip and breadcrumb roll.
- Carefully lower the coated cheese balls into the hot oil, working in batches to avoid overcrowding. Fry for 3-4 minutes, turning occasionally, until they’re golden brown and crispy, with a crackling sound and even color.
- Use a slotted spoon to remove the cheese balls from the oil, draining excess oil on paper towels. Rest for 1-2 minutes to finish cooling slightly and allow the exterior to set.
- Serve the cheese balls warm or at room temperature, garnished with extra herbs if desired. Enjoy the crispy exterior with the gooey, cheesy interior, perfect for sharing!
Tips and Tricks
- Bolded Mini-Head: Chill the mixture if too sticky—makes shaping easier and cleaner.
- Bolded Mini-Head: Use fresh breadcrumbs for a crispier crust—dry breadcrumbs can make it dull and powdery.
- Bolded Mini-Head: Maintain steady oil temp at 180°C/350°F—avoid overcrowding to keep temperature consistent.
- Bolded Mini-Head: For an extra crispy shell, double coat the balls—dipping in egg then breadcrumbs again.
- Bolded Mini-Head: Listen for a gentle crackling sound during frying—signals perfect golden crispness.
- Bolded Mini-Head: Rest the fried cheese balls 1-2 minutes—allows oil to drain and improves texture.
- Bolded Mini-Head: Serve immediately for best gooey texture—reheating can dry them out or make them soggy.
Common mistakes and how to fix them
- FORGOT to preheat oil → Ensure oil reaches 180°C/350°F before frying.
- DUMPED the cheese mixture too early → Chill mixture if too sticky to shape properly.
- OVER-TORCHED the cheese balls → Maintain steady heat to avoid burning and uneven color.
- MISSED the resting step → Rest fried cheese balls 1-2 minutes for optimal texture and less oil.
Quick Fixes & Pantry Hacks
- When oil shimmers and crackles, it’s ready—rescue with a slotted spoon if it smokes excessively.
- Splash a little water into hot oil to calm splatters—sizzle and shimmer warn of too-high heat.
- Patch sticky mixture with a touch more breadcrumbs—keep shaping without mess.
- Shield cheese balls from uneven heat by frying in small batches—avoid overcrowding for even crispness.
- If cheese leaks during frying, refrigerate balls for 10 minutes—helps them hold shape and prevents spattering.
Prep, store, and reheat tips
- You can prepare the cheese mixture a day in advance; keep it refrigerated and covered—flavors meld and stay fresh.
- Shape the cheese balls ahead of time and store on a tray lined with parchment—cover tightly with plastic wrap for up to 24 hours.
- Refrigerated cheese balls will stay good for 1-2 days; the texture might soften slightly, so best enjoyed within this window.
- For reheating, briefly fry or bake at 180°C/350°F until crispy and heated through—listen for that crackle and smell that cheesy aroma.
FAQs about Cheese Balls
1. Can I use other cheeses?
Use softened cream cheese and grated sharp cheddar for the best melt and flavor. Cold cheese can be hard to mix smoothly.
2. Can I bake instead of fry?
Yes, you can bake the cheese balls at 180°C/350°F for about 15-20 minutes until golden if you prefer baking over frying.
3. How should I serve leftovers?
Serve them immediately for the gooeyest texture, but they also taste good chilled. Reheat in oven at 180°C/350°F for crispy exterior.
4. How do I know when the oil is ready?
Ensure oil reaches 180°C/350°F before frying. Too cool and they’ll be greasy; too hot and they burn outside too quickly.
5. Can I customize the flavor?
Adding herbs like chives or parsley brightens the flavor. For more spice, mix in a dash of cayenne or smoked paprika.
6. My mixture is too soft to shape. What do I do?
If the mixture is too sticky, chill it for 10-15 minutes before shaping. This helps the balls hold their shape better.
7. What can I use instead of breadcrumbs?
Breadcrumbs give a crispy crust, but you can also use crushed nuts or toasted panko for different textures.
8. How do I prevent burning?
Overcooking can lead to burnt exterior and dry cheese. Keep an eye on the color and remove once golden.
9. How do I safely fry the cheese balls?
Use a slotted spoon to carefully lower and remove cheese balls from hot oil to prevent splatters and breakage.
10. How long do they keep in the fridge?
Cheese balls are best enjoyed fresh, but can be stored in the fridge for up to 2 days. Reheat by baking or frying for best texture.
These cheese balls are a reminder that simple ingredients, when treated right, can bring a real sense of comfort and joy. They’re perfect for casual nights when you want something warm, cheesy, and a little nostalgic to share with friends or family.
No matter how many times I make them, I still get that little thrill when they come out golden and crispy—smelling like childhood all over again. They’re not just snacks; they’re small moments of happiness that turn any gathering into something special.

Hi, I’m James Whitmore, the creator behind Salt Evangelist. If there is one ingredient I believe deserves more respect, it is salt. Not because it makes food salty, but because it makes food come alive. Salt highlights sweetness, softens bitterness, sharpens acidity, and deepens savoriness. It is not just seasoning. It is transformation.

