
Focusing on the tactile satisfaction of preparing and stuffing mushrooms, this recipe turns a simple vegetable into a hands-on, mindful ritual. There’s something oddly calming about getting your fingers messy, scooping out the stems, and pressing that filling deep into each cap. It’s a small act of meditation, especially when life feels busy and chaotic.
These baked stuffed mushrooms aren’t just about the taste—they’re about the process. The messy, satisfying hands-on work makes them more than a snack; it’s a moment to slow down, feel the textures, and enjoy the process of creation. Plus, that smell of garlic, herbs, and melting cheese as they bake is pure comfort, promising a cozy, tactile meal.
Focusing on the tactile satisfaction of preparing and stuffing mushrooms, emphasizing the messy, satisfying hands-on process that makes it feel like a small, mindful ritual amid busy weeknights.
The story behind this recipe
- This recipe came together on a rainy afternoon when I was craving something small but satisfying, something tactile that kept me grounded. I remember peeling mushrooms, feeling the earthy aroma fill the kitchen, and thinking how these humble caps could be transformed with just a few simple ingredients. The process became a bit of a ritual—stuffing, pressing, and then watching them turn golden in the oven. It’s a reminder that great comfort food often starts with the simplest, messiest acts in the kitchen.
- I’ve always loved how stuffed mushrooms invite you to get your hands in there—no fancy tools needed. It’s a moment where the mess feels like part of the pleasure, the kind of tactile work that makes you slow down. Plus, the smell of garlic, herbs, and melting cheese wafting through the house has become a little tradition on chilly days. These aren’t just snacks; they’re small acts of mindful creation, wrapped in earthy, cheesy goodness.
- heading: ‘The story behind this recipe’
Key ingredients and tips
- Mushrooms: I look for firm, plump caps with a deep earthy aroma. Skip any slimy or cracked ones, as they won’t hold the filling well.
- Cream Cheese: I prefer full-fat, which gives a rich, velvety texture. If you want lighter, swap in Greek yogurt, but watch for extra moisture.
- Garlic: Fresh cloves crushed release a pungent, fragrant aroma that makes the whole kitchen smell alive. Use more if you love a bold punch.
- Parsley: Bright green leaves add a fresh, grassy note. If you’re out, basil or chives bring their own lively flavor that works well.
- Parmesan: I love the nutty, salty sharpness it adds. Pecorino or aged Manchego can be good swaps, just adjust the salt.
- Breadcrumbs: I toast these lightly before mixing for a crunchier, toasted flavor. Use panko for extra airiness or regular for softness.
- Olive Oil: Drizzle on top before baking for a glossy finish and extra richness. A good quality oil makes a noticeable difference in flavor.
Spotlight on key ingredients
Mushrooms:
- I look for firm, plump caps with a deep earthy aroma. Skip any slimy or cracked ones, as they won’t hold the filling well.
- Cream Cheese: I prefer full-fat, which gives a rich, velvety texture. If you want lighter, swap in Greek yogurt, but watch for extra moisture.
- Garlic: Fresh cloves crushed release a pungent, fragrant aroma that makes the whole kitchen smell alive. Use more if you love a bold punch.
Cheese and Breadcrumbs:
- Parmesan: I love the nutty, salty sharpness it adds. Pecorino or aged Manchego can be good swaps, just adjust the salt.
- Breadcrumbs: I toast these lightly before mixing for a crunchier, toasted flavor. Use panko for extra airiness or regular for softness.
Notes for ingredient swaps
- Dairy-Free: Swap cream cheese for cashew-based cheese or blended silken tofu—less creamy, but still satisfying.
- Vegan: Use nutritional yeast and vegan cheese in place of Parmesan and cream cheese for cheesy flavor without dairy.
- Gluten-Free: Replace breadcrumbs with crushed, toasted nuts or gluten-free panko—adds crunch without wheat.
- Herb Variations: Substitute parsley with basil or chives for a different, fresh herbal note that still brightens the dish.
- Cheese Choices: Swap Parmesan for Pecorino or aged Manchego—each adds a unique nutty, sharp tang.
- Oil Swap: Use avocado oil instead of olive oil for a milder, buttery flavor that withstands higher heat.
- Filling Boost: Mix in cooked, crumbled sausage or chopped bacon for a smoky, savory depth—skip for vegetarian version.
Equipment & Tools
- Baking dish: Holds the stuffed mushrooms during baking.
- Skillet: Sauté mushroom stems and garlic.
- Small mixing bowl: Combine and stir the filling ingredients.
- Spoon: Fill the mushroom caps evenly.
- Oven: Bake the stuffed mushrooms to perfection.
Step-by-step guide to stuffed mushrooms
- Preheat your oven to 190°C (375°F). Gather a baking dish that fits the mushroom caps snugly—something about 20×20 cm (8×8 inches).
- Clean the mushrooms gently with a damp cloth, remove stems, and set the caps aside. Chop stems finely—these are key for the filling.
- In a small skillet over medium heat (around 160°C/320°F), warm a tablespoon of olive oil. Sauté the mushroom stems with minced garlic (about 2 cloves), a pinch of salt, and pepper until fragrant and slightly browned—around 4-5 minutes.
- In a bowl, combine 4 oz (115 g) cream cheese, the sautéed stems and garlic, a handful of chopped parsley, 1/4 cup grated Parmesan, and 1/4 cup breadcrumbs. Mix until well blended. Taste and adjust salt or herbs if needed.
- Using a spoon, scoop the filling into each mushroom cap, pressing gently to pack it in. Overfill slightly for a hearty bite. Arrange the stuffed caps in your baking dish.
- Drizzle a little olive oil over the stuffed mushrooms and sprinkle some extra Parmesan on top for a golden crust. Place in the oven and bake for about 20 minutes, or until the tops are bubbling and golden brown.
- Check for doneness: the filling should be firm but still moist, and the cheese should be melted and slightly caramelized on top. The mushrooms will be tender when pierced with a fork.
- Remove from oven and let rest for 5 minutes. Serve warm, directly from the dish, with a sprinkle of fresh herbs if desired.
Let the mushrooms rest for 5 minutes after baking. Serve directly from the dish, garnished with fresh herbs if desired.
How to Know It’s Done
- Golden brown tops with bubbling cheese.
- Mushroom caps are tender but hold shape.
- Filling feels firm when pressed gently.
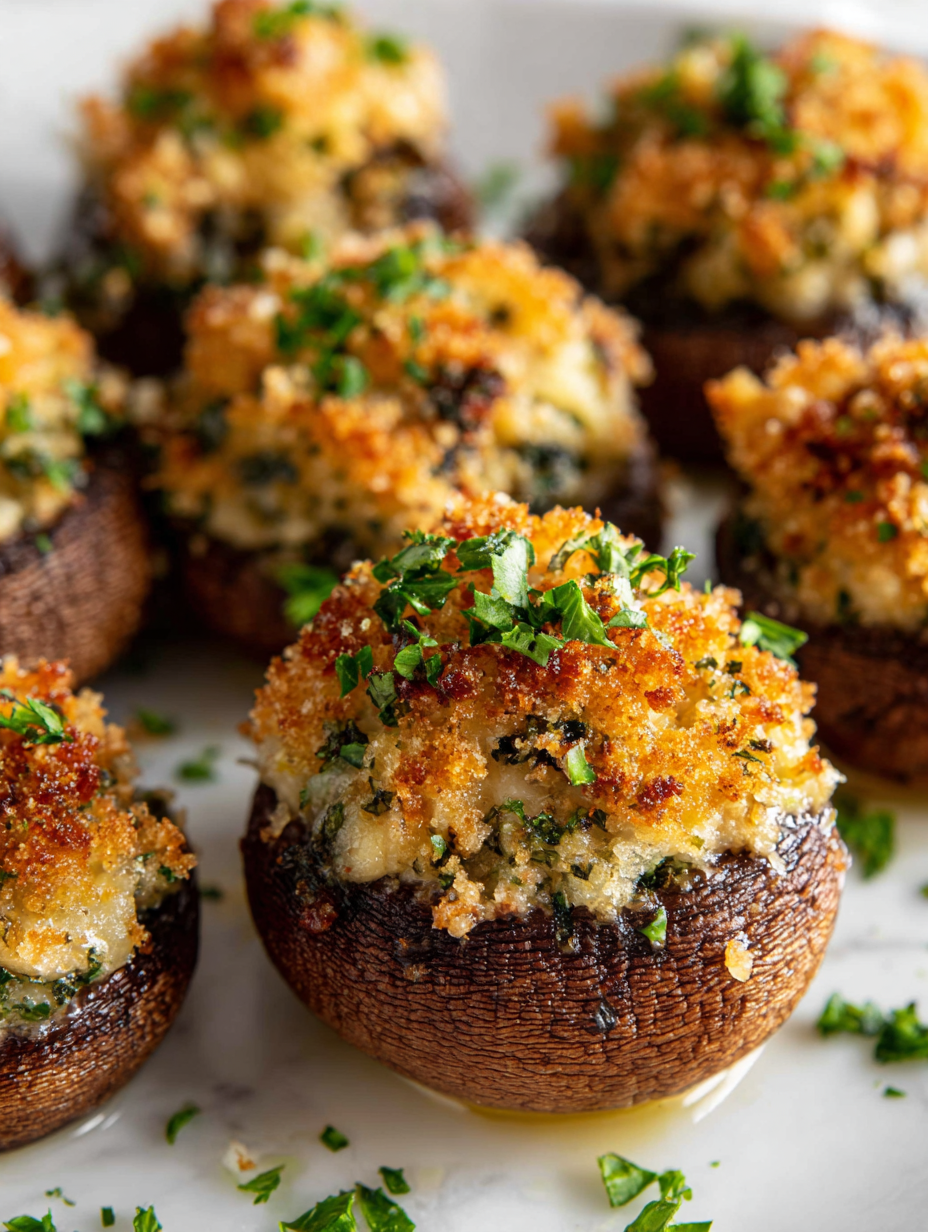
Baked Stuffed Mushrooms
Ingredients
Equipment
Method
- Preheat your oven to 190°C (375°F). Place a baking dish nearby to hold your stuffed mushrooms.
- Gently clean each mushroom with a damp cloth, then carefully remove the stems and set the caps aside. Finely chop the stems, which will be part of your filling.
- Heat a tablespoon of olive oil in a skillet over medium heat until shimmering and fragrant. Add the chopped mushroom stems and minced garlic, cooking until they release a deep aroma and soften, about 4-5 minutes.
- In a small bowl, combine the sautéed stems and garlic with cream cheese, grated Parmesan, toasted breadcrumbs, chopped parsley, and a pinch of salt and pepper. Mix until smooth and well combined.
- Using a spoon, gently press and fill each mushroom cap with the prepared mixture, pressing down slightly to pack it in. Overfill each cap for a hearty bite.
- Arrange the stuffed mushrooms in your baking dish, then drizzle a little olive oil over the tops and sprinkle with extra Parmesan for a golden crust.
- Bake in the oven for about 20 minutes, or until the tops are bubbling and golden brown. The mushrooms will be tender, and the cheese will be melted and slightly caramelized.
- Remove from the oven and let rest for 5 minutes. The filling will set slightly, making them easier to serve neatly.
- Serve warm, garnished with a sprinkle of fresh parsley if desired, and enjoy the tender, cheesy, aromatic bites.
Pro Tips for Perfect Stuffed Mushrooms
- Bolded Mini-Head: Use high-quality olive oil for a richer, more fragrant crust that shimmers as it bakes.
- Bolded Mini-Head: Toast breadcrumbs lightly before mixing to add a nutty crunch and prevent sogginess.
- Bolded Mini-Head: Sauté mushroom stems until deeply fragrant—about 4-5 minutes—to develop a savory, umami base.
- Bolded Mini-Head: Press filling firmly into mushroom caps, but avoid overstuffing—this keeps them neat and prevents spillage.
- Bolded Mini-Head: For an extra golden top, broil for 1-2 minutes at the end, keeping a watch to prevent burning.
- Bolded Mini-Head: Rest baked mushrooms for 5 minutes—this helps the filling set and makes serving cleaner.
- Bolded Mini-Head: If cheese browns too fast, lightly cover with foil to prevent burning while the filling heats through.
Common mistakes and how to fix them
- FORGOT to preheat the oven → Always preheat to ensure even cooking and browning.
- DUMPED filling into mushrooms without packing → Gently press filling to avoid spillage during baking.
- OVER-TORCHED cheese topping → Cover with foil if cheese browns too quickly.
- MISSED resting time → Rest for 5 minutes to allow flavors to settle and filling to firm up.
Fast fixes for common issues
- When mushrooms release too much water, splash a little salt on caps to draw out excess moisture.
- If filling is too runny, dump in a spoon of breadcrumbs to absorb moisture and thicken it quickly.
- Over-torched cheese? Shield with foil and lower oven temp to prevent burning while finishing.
- Forgot to preheat? Do a quick 5-minute heat-up to ensure even baking and golden tops.
- When filling spills over, rescue with a teaspoon to tidy edges and prevent burning on the baking sheet.
Prep, store, and reheat tips
- Prepare the filling and stuff the mushroom caps up to a day in advance—keep them covered in the fridge to preserve freshness and avoid drying out. The earthy aroma of the mushrooms will mingle with herbs, promising a fragrant bake.
- Store baked stuffed mushrooms in an airtight container in the fridge for up to 2 days. The cheese may firm up slightly, but reheating restores their gooey texture with a quick blast in the oven or microwave.
- For longer storage, freeze the assembled mushrooms—wrap tightly to prevent freezer burn—and bake directly from frozen. Expect a slightly softer texture, but the flavors remain rich and satisfying.
- Reheat in a 180°C (350°F) oven for about 10-15 minutes until heated through and bubbling. Sensory cues: smell of garlic and cheese, bubbling tops, and tender mushrooms signal readiness. Avoid overheating to prevent drying out.
Top questions about baked stuffed mushrooms
1. How do I pick the best mushrooms?
Choose firm, plump mushrooms with a deep earthy smell. Avoid slimy or cracked caps for a better hold on the filling.
2. Can I use a different cheese?
Use full-fat cream cheese for richness, or swap with Greek yogurt for a lighter version. It might change the creaminess a bit.
3. How do I know when they are done?
Bake at 190°C (375°F) until the tops are golden and bubbling, usually about 20 minutes. Check for a firm filling and tender mushroom caps.
4. What if the cheese gets too dark?
If cheese browns too quickly, tent with foil to prevent burning while the filling finishes cooking.
5. Can I make these in advance?
Prepare the stuffed mushrooms a day ahead and keep refrigerated. Reheat in a 180°C (350°F) oven until hot and bubbly, about 10-15 minutes.
6. How do I keep the topping crispy?
For crispy topping, toast breadcrumbs lightly before mixing. It adds crunch and prevents sogginess.
7. My filling is too watery, what now?
If filling is too runny, mix in a tablespoon of toasted breadcrumbs to absorb excess moisture and thicken it up.
8. Mushrooms release water, how do I fix it?
When mushrooms release too much water, sprinkle a little salt on caps to draw out moisture before filling.
9. How do I stuff the mushrooms properly?
Use a spoon to gently press the filling into the mushroom caps, avoiding overstuffing which can cause spillage while baking.
10. Should I let them rest after baking?
Rest the baked mushrooms for 5 minutes after coming out of the oven. This helps the filling set and makes serving neater.
These baked stuffed mushrooms are more than just a snack; they’re a tactile, satisfying process that grounds you in the kitchen. The earthy aroma mingling with garlic and cheese makes every bite a small, comforting ritual. In times when we crave both simplicity and richness, they remind us that good food can come from humble ingredients and hands-on care.
Enjoying these mushrooms hot from the oven, with their gooey, golden tops, is a reminder that sometimes the best moments are found in the messy, honest work of cooking. They’re perfect for when you need a cozy, flavorful bite that feels like a small act of mindful creation, right in the middle of a busy day.