Mushroom caps often get overlooked, seen as just a side or a filler. But I see them as a blank slate, a canvas waiting for bold, unexpected fillings that can really steal the show at the table. There’s something satisfying about turning these humble fungi into a little masterpiece with just a few ingredients and a hot oven.
This baked mushroom caps recipe is my go-to for when I want something simple but impressive. It’s a dish that invites creativity—swap in different cheeses, herbs, or even a spicy kick. Honestly, the way the aroma fills the kitchen while they bake, with that smoky, earthy scent, makes every prep moment worth it.
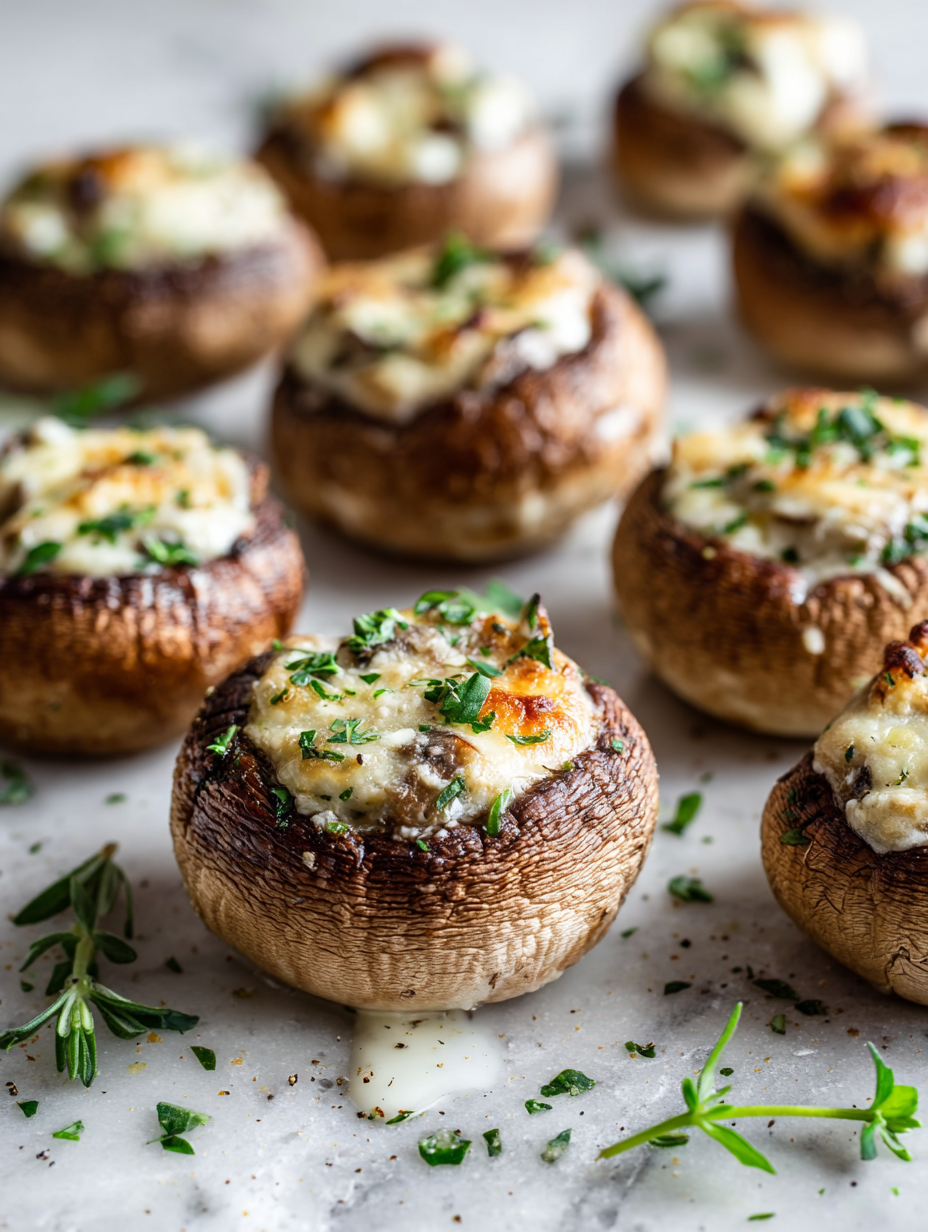
Focusing on the overlooked beauty of mushroom caps as a blank canvas for bold, unexpected fillings that turn a simple appetizer into a conversation starter.
The story behind this recipe
- I first made these mushroom caps on a whim, after a failed attempt at a fancy stuffed chicken. The smell of roasting mushrooms, with that hint of smokiness, took me back to my childhood camping trips. It was a simple, honest moment that made me realize how much flavor you can pack into something so humble.
- Over the years, I’ve tweaked the fillings and seasoning, but the core idea of transforming these caps into something special has stayed the same. There’s a quiet pride in serving a dish that looks unassuming but delivers a punch of earthy, cheesy goodness. It’s become a staple when I want something quick but memorable, especially during mushroom season.
- heading: ‘The story behind this recipe’
Ingredient breakdown: key components
- Cremini mushrooms: I love their firm, meaty texture and deep flavor, but button mushrooms work fine if you want a milder taste. Try to pick ones with clean, unblemished caps for the best appearance and flavor.
- Cream cheese: It’s the glue that makes the filling rich and creamy, with a slight tang. If you want a lighter version, swap in Greek yogurt—just expect a bit less silkiness.
- Garlic: I always use fresh garlic for that punchy, fragrant aroma that really wakes up the dish. If you’re sensitive, reduce the amount, but don’t skip it entirely—garlic is the soul here.
- Herbs (parsley, thyme): Fresh herbs add brightness and a hint of earthiness, especially when chopped finely. Dry herbs can work, but they won’t deliver the same vibrant punch or aroma.
- Grated Parmesan: It offers a salty, nutty depth that melts into the filling, giving it that savory umami kick. Substitute with Pecorino for a sharper flavor or nutritional yeast for a vegan twist.
- Olive oil: I drizzle a little before baking to help the caps caramelize and add a subtle fruity note. Use good-quality extra virgin for the best aroma and flavor, or a neutral oil if you prefer a milder taste.
- Lemon juice: A splash brightens everything up with fresh citrus vibrancy, balancing the richness. Skip if you want a more subdued, earthier flavor, but don’t skip the zest for extra zing.
Spotlight on key ingredients
Cream cheese:
- Cremini mushrooms: I love their firm, meaty texture and deep flavor, but button mushrooms work fine if you want a milder taste. Try to pick ones with clean, unblemished caps for the best appearance and flavor.
- It’s the glue that makes the filling rich and creamy, with a slight tang. If you want a lighter version, swap in Greek yogurt—just expect a bit less silkiness.
- Garlic: I always use fresh garlic for that punchy, fragrant aroma that really wakes up the dish. If you’re sensitive, reduce the amount, but don’t skip it entirely—garlic is the soul here.
Herbs and cheese:
- Herbs (parsley, thyme): Fresh herbs add brightness and a hint of earthiness, especially when chopped finely. Dry herbs can work, but they won’t deliver the same vibrant punch or aroma.
- Grated Parmesan: It offers a salty, nutty depth that melts into the filling, giving it that savory umami kick. Substitute with Pecorino for a sharper flavor or nutritional yeast for a vegan twist.
- Olive oil: I drizzle a little before baking to help the caps caramelize and add a subtle fruity note. Use good-quality extra virgin for the best aroma and flavor, or a neutral oil if you prefer a milder taste.
Notes for ingredient swaps
- Dairy-Free: Swap cream cheese for blended silken tofu or cashew cheese—less creamy, but still rich in texture.
- Vegan: Use vegan Parmesan or nutritional yeast instead of cheese—adds umami without dairy.
- Gluten-Free: Ensure toppings and fillers are gluten-free, like gluten-free breadcrumbs or omit entirely.
- Herb Variations: Fresh basil or cilantro can replace parsley or thyme, introducing bright, unexpected notes.
- Oil Choices: Use avocado oil for a milder, buttery flavor or a neutral oil if you prefer subtlety.
- Lemon Alternatives: Lime juice or a splash of vinegar can brighten dishes similarly—adjust to taste.
- Mushroom Variants: Portobello caps or shiitake stems can be swapped for a different earthy depth, depending on availability.
Equipment & Tools
- Oven: To bake the mushroom caps evenly.
- Baking tray with parchment: To hold the caps during baking and prevent sticking.
- Small spoon: For filling the mushroom caps accurately.
- Sharp knife: To finely chop garlic and mushroom stems.
- Mixing bowl: To combine the filling ingredients.
Step-by-step guide to baked mushroom caps
- Preheat your oven to 200°C (390°F). Gather a baking tray lined with parchment paper and a small spoon for filling. Clean the mushroom caps gently with a damp cloth, removing any dirt, then set aside to dry. Slice the garlic finely while the oven warms up.
- Remove stems from the mushroom caps carefully, saving some for chopping if you like. Brush the caps lightly with olive oil, coating evenly. Place them gill-side up on the baking tray, spaced apart. Bake for 8-10 minutes until they start to soften and release a faint aroma.
- Meanwhile, chop the mushroom stems finely. In a bowl, mix cream cheese, grated Parmesan, chopped stems, minced garlic, chopped herbs, a squeeze of lemon juice, and a pinch of salt and pepper. Stir until well combined. Taste and adjust seasoning if needed.
- Remove the partially baked caps from the oven. Using a small spoon, generously fill each cap with the prepared mixture, pressing slightly to pack the filling. Return to the oven and bake for another 12-15 minutes, until the filling is golden and bubbly.
- Once out of the oven, let the mushroom caps rest for about 3-5 minutes. They will be hot and the filling will firm up slightly. Serve warm, garnished with extra herbs or a drizzle of olive oil if desired. Plate carefully—these are tender but messy if rushed.
Let the baked caps rest for 3-5 minutes to set. Serve warm directly from the tray or transfer to a plate. Garnish with extra herbs if desired for a fresh pop of color and flavor.
How to Know It’s Done
- Caps are golden around edges and filling is bubbling.
- Filling is set but still creamy, with a slight crust on top.
- Mushroom caps are tender to the touch but not collapsing.
Baked Mushroom Caps with Creamy Filling
Ingredients
Equipment
Method
- Preheat your oven to 200°C (390°F). Gently clean the mushroom caps with a damp cloth, then set them aside to dry. Carefully remove the stems and chop them finely, setting aside a few for stuffing later.
- Brush the mushroom caps lightly with olive oil, coating all over, then place them gill-side up on a parchment-lined baking tray. Bake for 8-10 minutes until they begin to soften and smell earthy and fragrant.
- While the caps bake, combine the cream cheese, grated Parmesan, chopped mushroom stems, minced garlic, chopped parsley, thyme, lemon juice, and a pinch of salt and pepper in a mixing bowl. Stir until the mixture is smooth and well combined.
- Remove the mushroom caps from the oven and carefully spoon the filling into each, pressing gently to pack it in. Return the tray to the oven and bake for another 12-15 minutes, until the filling is golden and bubbling around the edges.
- Once baked, transfer the mushroom caps to a serving platter and let rest for 3-5 minutes. The filling will set slightly and the aroma of herbs and cheese will be irresistible.
- Garnish with extra chopped parsley or a drizzle of olive oil if desired, then serve warm for a perfect bite-sized appetizer or light main.
Tips for perfect baked mushroom caps
- Use a hot oven (200°C/390°F) to quickly caramelize the mushroom caps, enhancing their earthy aroma.
- When filling, press the mixture firmly into each cap to ensure it stays put during baking.
- Keep an eye on the caps; remove once edges turn golden and filling is bubbling—overcooking leads to dryness.
- Let the baked caps rest 3-5 minutes before serving; this helps the filling set and flavors meld.
- For extra flavor, sprinkle a little more Parmesan or fresh herbs right after baking for a fragrant finish.
Common mistakes and how to fix them
- FORGOT to preheat the oven → Always preheat to ensure even cooking and proper browning.
- DUMPED filling into caps without packing → Gently press filling for a uniform bake and presentation.
- OVER-TORCHED the mushroom caps → Watch closely; remove when edges are golden, not burnt.
- MISSED resting time → Rest for 3-5 minutes for the filling to set and flavors to meld.
Quick kitchen fixes
- When mushrooms release excess moisture, splash a little lemon juice to brighten and dry surface.
- If filling is too loose, rescue with a quick stir in a spoonful of bread crumbs for firmness.
- DUMPED filling overflowed? Patch with a sprinkle of cheese and bake a few extra minutes.
- Overcooked caps? Shield with foil and lower oven temp to 180°C (350°F) for gentle reheating.
- When lacking fresh herbs, pantry swap with dried ones—use half the amount to avoid overpowering.
Prep, store, and reheat tips
- You can prepare the filling mixture a day ahead; keep it covered in the fridge to preserve freshness and prevent drying out.
- Assemble the stuffed mushroom caps up to 2 hours before baking; store them in an airtight container in the fridge. The caps may release some moisture, so pat them dry if needed before baking.
- Baked mushroom caps are best enjoyed within 24 hours for optimal flavor and texture. After that, the filling can get a bit watery and the mushrooms lose some firmness.
- Reheat leftovers in a warm oven (about 180°C/350°F) for 8-10 minutes until heated through. The tops should shimmer slightly, and the filling will be creamy again after warming.
Top questions about baked mushroom caps
1. What type of mushrooms should I use?
Choose mushrooms that are firm, with unblemished caps, for best texture and flavor. Cremini or button mushrooms work well, and look for ones with a deep, earthy aroma.
2. How much garlic do I need?
Use fresh garlic for a punchy, fragrant aroma; minced finely to distribute evenly in the filling. If sensitive to garlic, reduce the amount but don’t omit it entirely.
3. How do I know when they’re done?
Bake at 200°C (390°F) until the caps are tender and golden around the edges, with bubbling, crispy filling on top. Check that the filling is set and the mushrooms are cooked through.
4. What if the filling is too runny?
If the filling is too loose, stir in a spoonful of bread crumbs or grated cheese to help it set better during baking. For overly watery mushrooms, pat them dry before filling.
5. Can I make this vegan/dairy-free?
For a dairy-free option, swap cream cheese with blended silken tofu or cashew cheese—less creamy but still flavorful. Use nutritional yeast instead of cheese for a vegan version.
6. What if the mushrooms release too much water?
If the mushroom caps release excess moisture during baking, splash a little lemon juice or increase oven temperature slightly to help evaporate moisture and enhance flavor.
7. How should I fill the mushroom caps?
Use a small spoon to fill the mushroom caps firmly, pressing the filling in to prevent it from falling out during baking. Rest the baked caps for 3-5 minutes before serving.
8. Can I prepare these in advance?
Store unbaked stuffed caps in the fridge up to 2 hours ahead. Bake within that window for the best texture. Reheat leftovers in a warm oven, watching for bubbling and crispy edges.
9. How do I fix overcooked or overflowing caps?
If you over-burn the edges, shield with foil and lower oven temp to finish gently. If filling overflows, add a sprinkle of cheese or herbs on top before baking.
10. Any tips for prepping ingredients?
Use a sharp knife to finely chop garlic and mushroom stems for even distribution. Keep the oven hot enough to caramelize the caps without burning.
These baked mushroom caps are more than just an appetizer; they’re a reminder that simple ingredients, treated thoughtfully, can create real comfort. The earthy aroma, the melty cheese, the tender caps—each bite is a small celebration of what’s available in season and in your pantry right now.
They’re perfect for casual dinners or unexpected guests, and they hold a quiet magic in how quickly they come together. Honestly, I find myself craving that smoky scent filling the kitchen, especially during mushroom season when everything feels a little more rooted and honest.

Hi, I’m James Whitmore, the creator behind Salt Evangelist. If there is one ingredient I believe deserves more respect, it is salt. Not because it makes food salty, but because it makes food come alive. Salt highlights sweetness, softens bitterness, sharpens acidity, and deepens savoriness. It is not just seasoning. It is transformation.

