Baking falafel might seem a bit unconventional, but honestly, it’s a game changer for those of us who dread the greasy mess of deep frying. The aroma of cumin, garlic, and fresh herbs baking together is just as satisfying, if not more so, than the traditional method. Plus, it’s a lot easier to get crispy edges without standing over hot oil.
I started experimenting with baked falafel after a lazy weekend craving something hearty but simple. The challenge was to keep that tender, almost creamy interior while developing a satisfying crunch on the outside. Turns out, baking does the trick — it’s less chaotic, cleaner, and way more forgiving for home cooks who want flavor without the fuss.
Focusing on the lesser-known technique of baking falafel instead of frying, highlighting how it changes texture and mood, making it accessible for home cooks who shy away from deep frying but still crave that crispy, fragrant bite.
The story behind this recipe
- One rainy afternoon, I was rummaging through my spice rack, craving something familiar but different. The idea of baked falafel clicked when I realized I could get that crispy exterior without the mess of frying. It’s a way to enjoy all those vibrant flavors without the guilt or chaos.
- My first batch was a bit uneven — some parts crispy, others a little soft — but that’s part of the charm. Over time, I tweaked the texture and seasoning, and now it’s become a go-to for quick lunches and cozy dinners. It’s honest, imperfect, and just plain good.
Ingredient breakdown
- Canned chickpeas: I mash these until almost smooth, but you might prefer a chunkier texture. They give the falafel that hearty, earthy base, and a vivid aroma when cooked.
- Fresh parsley: I chop it finely for brightness, but you could use cilantro for a different herbal punch. It adds a fresh, grassy note and a crisp green color.
- Garlic: I love crushing it fresh; the pungent aroma wakes up everything. If you want milder flavor, roast the garlic first for a sweeter, smoky depth.
- Cumin: I toast the seeds lightly before grinding to deepen the warm, nutty aroma. Skip this step if you’re in a rush, but it really boosts flavor.
- Flour: I use regular all-purpose to bind, but almond flour works if you want a nutty twist or need a gluten-free option. Just watch the texture—less sticky if you go nutty.
- Lemon juice: I squeeze fresh for that zingy brightness, which cuts through the earthiness. A splash of vinegar can substitute, but it won’t have quite the same fresh pop.
- Olive oil: I brush the falafel before baking for a golden crust, but you can skip it if you prefer a lighter, less crispy bite. The oil adds a smoky sheen and crispness.
Spotlight on key ingredients
Canned chickpeas:
- Chickpeas: I mash these until almost smooth, but you might prefer a chunkier texture. They give the falafel that hearty, earthy base, and a vivid aroma when cooked.
- Fresh parsley: I chop it finely for brightness, but you could use cilantro for a different herbal punch. It adds a fresh, grassy note and a crisp green color.
Cumin:
- Garlic: I love crushing it fresh; the pungent aroma wakes up everything. If you want milder flavor, roast the garlic first for a sweeter, smoky depth.
- I toast the seeds lightly before grinding to deepen the warm, nutty aroma. Skip this step if you’re in a rush, but it really boosts flavor.
Notes for ingredient swaps
- Canned chickpeas: I mash these until almost smooth, but you might prefer a chunkier texture. They give the falafel that hearty, earthy base, and a vivid aroma when cooked.
- Fresh parsley: I chop it finely for brightness, but you could use cilantro for a different herbal punch. It adds a fresh, grassy note and a crisp green color.
- Garlic: I love crushing it fresh; the pungent aroma wakes up everything. If you want milder flavor, roast the garlic first for a sweeter, smoky depth.
- Cumin: I toast the seeds lightly before grinding to deepen the warm, nutty aroma. Skip this step if you’re in a rush, but it really boosts flavor.
- Flour: I use regular all-purpose to bind, but almond flour works if you want a nutty twist or need a gluten-free option. Just watch the texture—less sticky if you go nutty.
- Lemon juice: I squeeze fresh for that zingy brightness, which cuts through the earthiness. A splash of vinegar can substitute, but it won’t have quite the same fresh pop.
- Olive oil: I brush the falafel before baking for a golden crust, but you can skip it if you prefer a lighter, less crispy bite. The oil adds a smoky sheen and crispness.
Equipment & Tools
- Oven: To bake the falafel evenly and crisply
- Baking sheet: To hold the falafel during baking
- Parchment paper: To prevent sticking and make cleanup easier
- Food processor or bowl and masher: To mash and mix the ingredients
- Spatula or spoon: To shape and turn the falafel
Step-by-step guide to baked falafel
- Preheat your oven to 200°C (390°F). Gather a baking sheet, parchment paper, and a food processor or sturdy bowl.
- Drain and rinse the chickpeas. If using canned, dry them thoroughly; if cooked from dry, ensure they’re soft but not mushy.
- In a food processor, pulse the chickpeas until coarsely ground—some texture is good, don’t make them a paste. If doing by hand, mash with a fork or potato masher until chunky but cohesive.
- Add finely chopped parsley, minced garlic, ground cumin, a squeeze of lemon, and a pinch of salt and pepper. Mix well to combine. If using by hand, stir with a sturdy spoon or your hands.
- Sprinkle in flour, a tablespoon at a time, until the mixture holds together when pressed. It should be moist but not sticky. Adjust with more flour or a splash of water as needed.
- Shape the mixture into small, flat patties or balls, about 2 inches in diameter. Place them on the prepared baking sheet lined with parchment.
- Brush or spray the falafel with a little olive oil for a golden exterior. Bake for 20-25 minutes, flipping halfway through, until crispy and browned around the edges.
- Once baked, let the falafel rest for 5 minutes on the baking sheet. This helps set the crust and prevents breaking when serving.
- Serve warm, with a side of tahini sauce, yogurt, or tucked into pita with fresh veggies. Enjoy that fragrant, crispy bite!
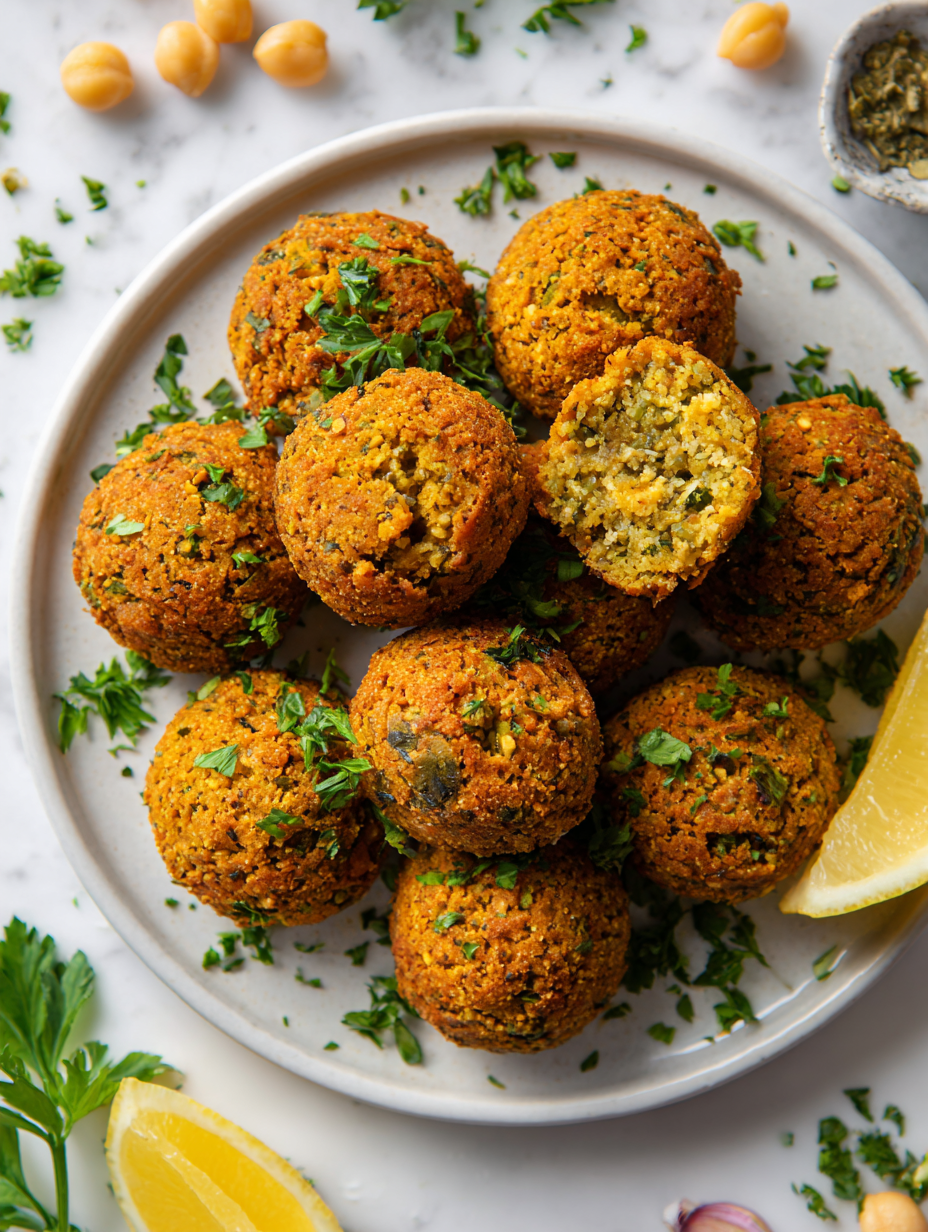
Let the baked falafel rest for 5 minutes before serving. Serve with your favorite dips or in pita pockets for a casual, flavorful meal. The exterior should be crisp, and the interior tender and fragrant.
How to Know It’s Done
- Golden-brown color and crispy exterior
- Internal texture firm but tender
- Aromatic smell of garlic and cumin filling the kitchen
Baked Falafel
Ingredients
Equipment
Method
- Preheat your oven to 200°C (390°F). Line a baking sheet with parchment paper for easy cleanup.
- Drain and rinse the canned chickpeas thoroughly, then pat them dry with a clean towel to remove excess moisture.
- Place the chickpeas in a food processor or mash them in a sturdy bowl using a fork or potato masher until they’re coarsely ground but not a smooth paste.
- Add the finely chopped parsley, minced garlic, toasted cumin, and lemon juice to the chickpeas. Mix everything together until well combined and fragrant.
- Sprinkle in the flour a little at a time, stirring or mixing with your hands until the mixture holds together when pressed. It should be moist but manageable.
- Shape the mixture into small, flat patties or balls about 2 inches in diameter, placing them on the prepared baking sheet. Keep them relatively uniform for even baking.
- Brush the tops of the falafel with a little olive oil to help achieve a crispy, golden exterior during baking.
- Bake the falafel in the preheated oven for 20-25 minutes, flipping them halfway through, until they’re golden brown and crispy around the edges.
- Remove the baked falafel from the oven and let them rest for 5 minutes to set the crust and prevent breaking when serving.
- Serve warm with your favorite dips like tahini or yogurt, or tuck into pita bread with fresh vegetables for a hearty meal.
Tips for perfect baked falafel
- Pre-soak the chickpeas: Dry them thoroughly before blending to ensure a firm, non-soggy falafel exterior.
- Chill the mixture: Let the falafel dough rest in the fridge for 30 minutes; it firms up for easier shaping and better texture.
- Use a light hand: When shaping, avoid over-pressing to keep the falafel light and airy inside.
- Brush with oil: A quick brush of olive oil before baking helps develop a golden, crispy crust.
- Flip halfway: Turn the falafel after 10-12 minutes to promote even browning and crunch.
- Monitor oven temp: Bake at 200°C (390°F); too high can burn, too low can result in soft edges.
- Rest before serving: Let baked falafel sit for 5 minutes after baking for a firmer, crunchier bite.
Common mistakes and how to fix them
- FORGOT to dry chickpeas thoroughly → Use dry chickpeas to prevent sogginess.
- DUMPED all ingredients at once → Mix gradually for an even, cohesive mixture.
- OVER-TORCHED the falafel → Bake at the correct temperature and flip halfway.
- MISSED resting time → Rest baked falafel for 5 minutes to set the crust.
Quick fixes and pantry swaps
- When falafel sticks to the pan, splash a little water or oil to loosen it.
- If mixture feels too wet, dump in more flour for better binding.
- Over-baked falafel? Patch with a quick brush of oil and a few extra minutes in the oven.
- When falafel turns pale, increase oven temperature slightly or bake a few minutes longer.
- Splash a bit of lemon juice or vinegar if flavors seem dull or flat after baking.
Prep, store, and reheat tips
- Prep the falafel mixture up to 24 hours in advance; keep it covered in the fridge. The flavors meld better overnight, and it firms up for easier shaping.
- Store baked falafel in an airtight container in the fridge for 3-4 days. Reheat in a 180°C (350°F) oven until just warmed and crispy around the edges—about 10 minutes. The aroma of garlic and cumin will re-emerge with each bite.
- Frozen baked falafel keeps well for up to 1 month. Freeze on a baking sheet, then transfer to a bag. Reheat directly from frozen, adding 5-7 minutes to bake time, until crackling and hot inside.
- Reheating makes the exterior slightly softer; for best texture, re-bake or toast briefly. Expect a gentle crackle and fragrant warmth when properly reheated.
Top questions about baked falafel
1. Can I use dried chickpeas instead of canned?
Use canned chickpeas, drained and rinsed, to avoid a mushy mixture. Freshly cooked can work too, but they should be soft and cooled first.
2. Do I need to add oil for baking?
Yes, you can bake falafel without oil, but brushing or spraying with a little oil helps achieve a crisp, golden exterior.
3. How long does it take to bake falafel?
Bake at 200°C (390°F) for about 20-25 minutes, flipping halfway, until the outside is crispy and golden.
4. My mixture is too sticky or dry, what do I do?
If the mixture feels too wet, add a bit more flour; if too dry, splash in a teaspoon of water or lemon juice.
5. How should I shape the falafel before baking?
Shape the mixture into small patties or balls, about 2 inches across, and place on parchment-lined baking sheet.
6. Can I customize the spices in the recipe?
For extra flavor, sprinkle some cumin or garlic powder into the mixture. Fresh herbs like parsley or cilantro also boost brightness.
7. How do I store and reheat baked falafel?
Baked falafel can be stored in the fridge for 3-4 days or frozen for up to a month. Reheat in the oven until crisp and fragrant.
8. How do I know when the falafel is fully baked?
Look for a golden-brown exterior, crispy edges, and a firm but tender interior as signs it’s done.
9. What herbs work best in baked falafel?
Using fresh parsley or cilantro adds a burst of herbal brightness and vibrant green color that wakes up the dish.
10. What common mistakes should I avoid when baking falafel?
Over-baking can dry out the falafel. Keep an eye on color and check for a crackling exterior that’s crispy to the touch.
Switching to baked falafel feels like reclaiming a favorite comfort with less mess and more control. The smell of cumin and herbs filling the kitchen is a small, sweet reward for the effort. It’s a reminder that sometimes, simplicity yields the most satisfying bites.
And honestly, these falafel are just as good—if not better—when they’re crispy on the outside and tender inside. They’re perfect for a quick lunch or a relaxed dinner, offering a flavorful, honest bite that keeps you coming back. No fuss, just good food made at home.

Hi, I’m James Whitmore, the creator behind Salt Evangelist. If there is one ingredient I believe deserves more respect, it is salt. Not because it makes food salty, but because it makes food come alive. Salt highlights sweetness, softens bitterness, sharpens acidity, and deepens savoriness. It is not just seasoning. It is transformation.

