Sweet potato fries often get a bad rap for being too uniform, too perfect. But I’ve found the real charm lies in their imperfections—those jagged edges, uneven thickness, and rustic look that make each batch feel like it was whipped up in a cozy kitchen, not a factory line. Baking them preserves that natural sweetness and gives them a tender interior with just enough caramelized crunch on the outside.
This recipe is about embracing the quirks—letting the irregular shapes and varied textures shine. It’s a reminder that cooking isn’t about perfection but about celebrating what makes each batch special. Plus, baking instead of frying keeps things a bit healthier and simpler, with fewer splatters and more focus on that smoky, sweet aroma that fills the room as they bake.
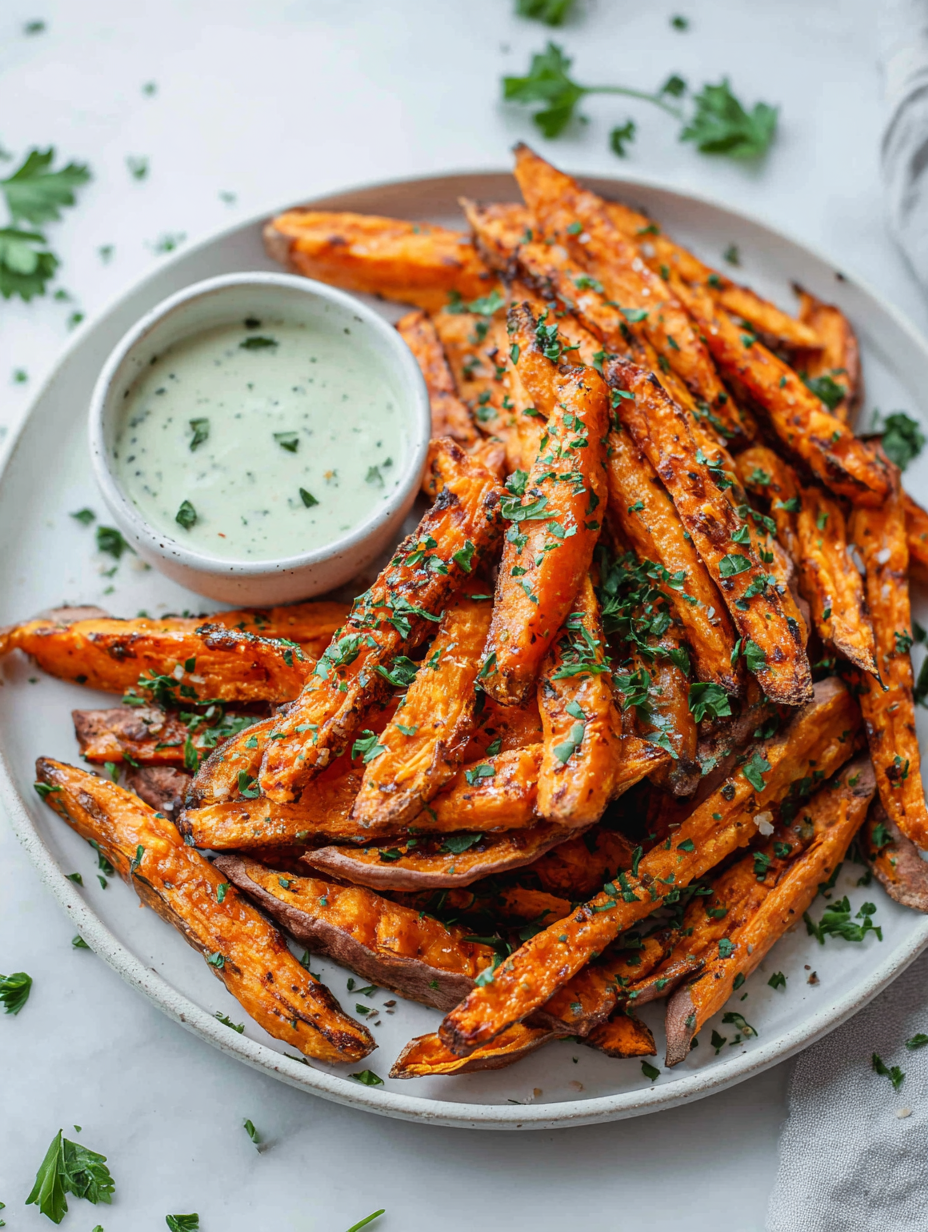
Focusing on the overlooked beauty of imperfect, rustic sweet potato fries—embracing their varied shapes and textures, celebrating the rustic charm that makes each batch feel homemade, cozy, and uniquely yours.
The story behind this recipe
- I stumbled on this recipe during a chilly weekend when I had a bunch of sweet potatoes and a craving for something cozy but with a bit of crunch. Baking these fries felt like a small act of rebellion—rejecting the greasy fast-food vibe and embracing simple, honest flavors. The smell of caramelized edges and roasted sweetness became the unexpected soundtrack of that lazy afternoon.
- What really keeps me coming back to this recipe is how it transforms humble sweet potatoes into something a little more special—crisp outside, tender inside, with that faint smoky aroma that makes everyone ask for seconds.
- It’s about finding joy in the imperfect: those jagged edges, the uneven shapes, the rustic look that feels so much more authentic than store-bought. Baking instead of frying isn’t just healthier; it lets the natural sweetness shine through without overwhelming it with oil or batter. Each batch feels like a small victory, a warm reminder that simplicity can be delicious.
Ingredient breakdown
- Sweet potatoes: I love how their earthy sweetness intensifies when roasted; if yours are a bit dry, toss them in a splash of oil to keep them moist and shiny.
- Olive oil: I prefer a light drizzle—just enough to coat the fries evenly; too much, and they get greasy, losing that crisp finish you want.
- Salt: I always start with a pinch, then taste and adjust after baking; a little extra salt at the end can really wake up the flavors.
- Paprika: I use smoked paprika for a subtle smoky depth that complements the sweet potatoes; if you want a milder twist, skip it or try garlic powder instead.
- Optional spices: A dash of cayenne adds a gentle kick, but if heat isn’t your thing, just stick with sea salt and a hint of pepper for simplicity.
- Baking sheet: I line mine with parchment to prevent sticking and make cleanup easier—trust me, it’s worth it for that perfect, crispy edge.
- Cooling rack: I like to cool the fries on a wire rack for a few minutes after baking; it keeps them crispy and prevents sogginess from steam.
Spotlight on key ingredients
Sweet potatoes:
- I love how their earthy sweetness intensifies when roasted; if yours are a bit dry, toss them in a splash of oil to keep them moist and shiny.
- Olive oil: I prefer a light drizzle—just enough to coat the fries evenly; too much, and they get greasy, losing that crisp finish you want.
- Salt: I always start with a pinch, then taste and adjust after baking; a little extra salt at the end can really wake up the flavors.
Spices & tools:
- Smoked paprika: It adds a subtle smoky depth that complements the sweet potatoes; if you want a milder twist, skip it or try garlic powder instead.
- Optional spices: A dash of cayenne adds a gentle kick, but if heat isn’t your thing, just stick with sea salt and a hint of pepper for simplicity.
- Baking sheet: I line mine with parchment to prevent sticking and make cleanup easier—trust me, it’s worth it for that perfect, crispy edge.
Notes for ingredient swaps
- Sweet potatoes: I love their earthy sweetness, but if yours are dry, toss them in a little extra oil to keep them moist and shiny.
- Olive oil: I prefer a light drizzle—just enough to coat the fries evenly; too much can make them greasy and less crispy.
- Salt: I start with a small pinch and taste after baking; feel free to add more for a punch of flavor at the end.
- Paprika: Smoked paprika gives a lovely smoky note, but you can substitute with garlic powder or a pinch of cayenne for heat.
- Optional spices: Cayenne adds heat, but if you want milder fries, skip it or try a dash of cumin for warmth.
- Baking sheet: Line with parchment to prevent sticking and make cleanup easier—trust me, it’s worth it for that perfect crunch.
- Cooling rack: Cool the fries on a wire rack after baking to keep them crispy and prevent sogginess from steam.
Equipment & Tools
- Baking sheet: To hold the fries while baking and ensure even heat exposure.
- Parchment paper: To prevent sticking and make cleanup easier.
- Large mixing bowl: To toss and coat the fries evenly with oil and spices.
- Spatula: To flip the fries for uniform baking.
- Cooling rack: To keep fries crispy after baking.
Step-by-step guide to baked sweet potato fries
- Preheat your oven to 220°C (425°F). Line a large baking sheet with parchment paper to keep things tidy.
- Wash and scrub 2 large sweet potatoes until clean. No need to peel unless you prefer them that way.
- Cut the sweet potatoes into rustic fries—about 1/2 inch thick. No need for perfect shapes, just aim for even thickness for uniform baking.
- In a large bowl, toss the cut fries with 2 tablespoons of olive oil—enough to coat but not drown. Add a pinch of salt and 1 teaspoon smoked paprika. Mix well to evenly distribute.
- Spread the fries in a single layer on the prepared baking sheet. Don’t crowd them; give each piece space to crisp up.
- Bake for 20 minutes. Then, flip the fries with a spatula and bake for another 10-15 minutes. Keep an eye on them; they should be golden-brown and caramelized at the edges.
- Check for doneness—fries should be crispy around the edges and tender inside. If they’re not quite there, give them a few more minutes, watching for a deep amber colour and fragrant aroma.
- Once baked, transfer to a cooling rack for 2-3 minutes to prevent sogginess and keep the crispness intact.
- Serve immediately, sprinkled with a little extra sea salt if needed, or with your favorite dipping sauce.
Let the fries rest on a rack for a few minutes to stay crispy. Serve hot with a sprinkle of sea salt or your favorite sauce.
How to Know It’s Done
- Fries are golden and caramelized at the edges.
- They feel firm but not hard, with a slight jiggle inside.
- A fragrant smoky aroma fills your kitchen, signaling they’re ready.
Rustic Baked Sweet Potato Fries
Ingredients
Equipment
Method
- Preheat your oven to 220°C (425°F) and line a baking sheet with parchment paper to prevent sticking.
- Wash and scrub the sweet potatoes thoroughly until clean. No need to peel unless you prefer them that way.
- Cut the sweet potatoes into rustic, uneven fries about 1/2 inch thick—you don’t need perfect shapes, just aim for even thickness for consistent baking.
- Place the cut fries into a large mixing bowl. Drizzle with olive oil and sprinkle with a pinch of salt and smoked paprika. Toss everything together with a spatula until the fries are evenly coated and glistening.
- Spread the fries out in a single layer on the prepared baking sheet, giving each piece enough space to get crispy and avoiding overcrowding.
- Bake in the preheated oven for 20 minutes, then flip the fries with a spatula to promote even browning. Continue baking for another 10-15 minutes until they are golden-brown at the edges and fragrant.
- Once baked, transfer the fries to a cooling rack and let them rest for 2-3 minutes—this helps them stay crispy and prevents sogginess from steam.
- Serve the sweet potato fries hot, sprinkled with additional salt if needed. Enjoy them on their own or with your favorite dipping sauce for a cozy, rustic treat.
Notes
Pro tips for perfect sweet potato fries
- Bolded mini-head: Use high heat → Ensures crispy edges without overcooking the interior.
- Bolded mini-head: Even cuts matter → Aim for rustic, uneven shapes for more caramelization and charm.
- Bolded mini-head: Light oil coat → Just enough to evenly coat fries; too much slows crisping.
- Bolded mini-head: Flip halfway → Promotes uniform browning and crunch on all sides.
- Bolded mini-head: Watch for colour → Fries should be deep amber and fragrant, not burnt or pale.
- Bolded mini-head: Cooling on rack → Keeps fries crispy by preventing steam from softening the outside.
Common mistakes and how to fix them
- FORGOT to check oven temperature → Use an oven thermometer for accuracy.
- DUMPED too much oil → Use just enough to lightly coat for crispiness.
- OVER-TORCHED fries → Reduce baking time or lower oven temp slightly.
- MISSED flipping fries → Flip halfway for even browning and crispness.
Quick fixes and pantry swaps
- When fries are soggy, splash them with a little extra oil and bake a few minutes longer.
- If fries stick to the parchment, shield with a light spray of non-stick spray for easier release.
- When fries lack crispness, rescue with a quick blast of high heat—10 minutes at 230°C (450°F).
- Dumped too much salt? Rinse briefly, pat dry, and bake again to restore balance.
- When sweet potatoes are unevenly cooked, pantry swap to par-cook in the microwave for 2 minutes before baking.
Prep, store, and reheat tips
- Pre-slice the sweet potatoes a day ahead, store in an airtight container in the fridge; they stay fresh and ready to bake.
- Keep peeled or cut fries in a sealed container with a damp paper towel to prevent drying out; use within 24 hours for best texture.
- Store baked fries in an airtight container in the fridge for up to 2 days; reheating will restore crispness, but they may lose some of their original crunch.
- Reheat in a 200°C (400°F) oven for 5-7 minutes until warm and crispy; avoid microwaving to keep the texture intact.
- For longer storage, freeze pre-cut fries on a baking sheet, then transfer to a bag and keep for up to 1 month. Reheat directly from frozen for best results, adding a few extra minutes.
Top questions about baked sweet potato fries
1. How do I pick the best sweet potatoes?
Choose firm, smooth sweet potatoes without soft spots. The skin should be taut and unblemished for the best texture after baking.
2. Can I make the fries thicker or thinner?
Cut them into rustic, uneven sticks—about 1/2 inch thick. Irregular shapes help them crisp up more naturally in the oven.
3. How much oil do I need?
Use a light coating of oil—just enough to lightly coat each piece. Too much will make them soggy, too little might hinder crisping.
4. What temperature and how long should I bake them?
Bake at 220°C (425°F) for about 30–35 minutes, flipping halfway through. Look for deep golden edges and a fragrant smell.
5. Can I make these ahead?
Yes, you can store cooked fries in an airtight container in the fridge for 1–2 days. Reheat in the oven for crispness, not the microwave.
6. How do I keep them crispy?
For extra crispiness, cool them on a wire rack after baking. If they start to soften, a quick re-bake at high heat helps revive crunch.
7. Can I customize the spices?
Adjust seasoning with more salt or spices after baking. For a smoky flavor, add a pinch of smoked paprika before baking.
8. What baking tools should I use?
Use parchment paper to prevent sticking and make cleanup easy. A silicone baking mat works even better for non-stick, crispy results.
9. What if they burn or overcook?
If fries burn early, reduce oven temperature slightly or bake for a shorter time. Keep an eye on the edges—they turn amber quickly.
10. How can I vary the flavor?
For a milder flavor, skip smoked paprika and add a pinch of garlic powder or cumin. You can also try a splash of lemon juice after baking.
These baked sweet potato fries remind me that simplicity often yields the most satisfying results. They’re perfect for cozy nights or whenever I need a little comforting crunch that’s easy to whip up. Plus, that fragrant, smoky aroma filling the kitchen makes everything feel just a bit more special. Sometimes, the best recipes are the ones that embrace imperfection and allow the natural sweetness to shine.
And honestly, I keep coming back to this one because it’s straightforward, forgiving, and reliably delicious. Whether you’re making a quick snack or a side for dinner, these fries are a humble reminder that good food doesn’t have to be complicated.

Hi, I’m James Whitmore, the creator behind Salt Evangelist. If there is one ingredient I believe deserves more respect, it is salt. Not because it makes food salty, but because it makes food come alive. Salt highlights sweetness, softens bitterness, sharpens acidity, and deepens savoriness. It is not just seasoning. It is transformation.

