When I first started paying attention to the edges of my garlic bread, I realized the real magic was in those crispy, caramelized bits. It’s not just about that buttery, garlicky goodness in the middle—those edges develop a smoky, nutty flavor that adds a whole new layer to each bite. It’s a reminder that sometimes, the overlooked parts are what make a simple dish extraordinary.
Baking garlic bread with a focus on those crispy edges means embracing a bit of chaos in the oven. The edges crackle with heat, turning a deep golden brown that’s almost charred but never burnt, offering a satisfying crunch. This approach makes me look forward to every piece, knowing it’s going to deliver that perfect balance of soft and crispy, buttery and smoky.
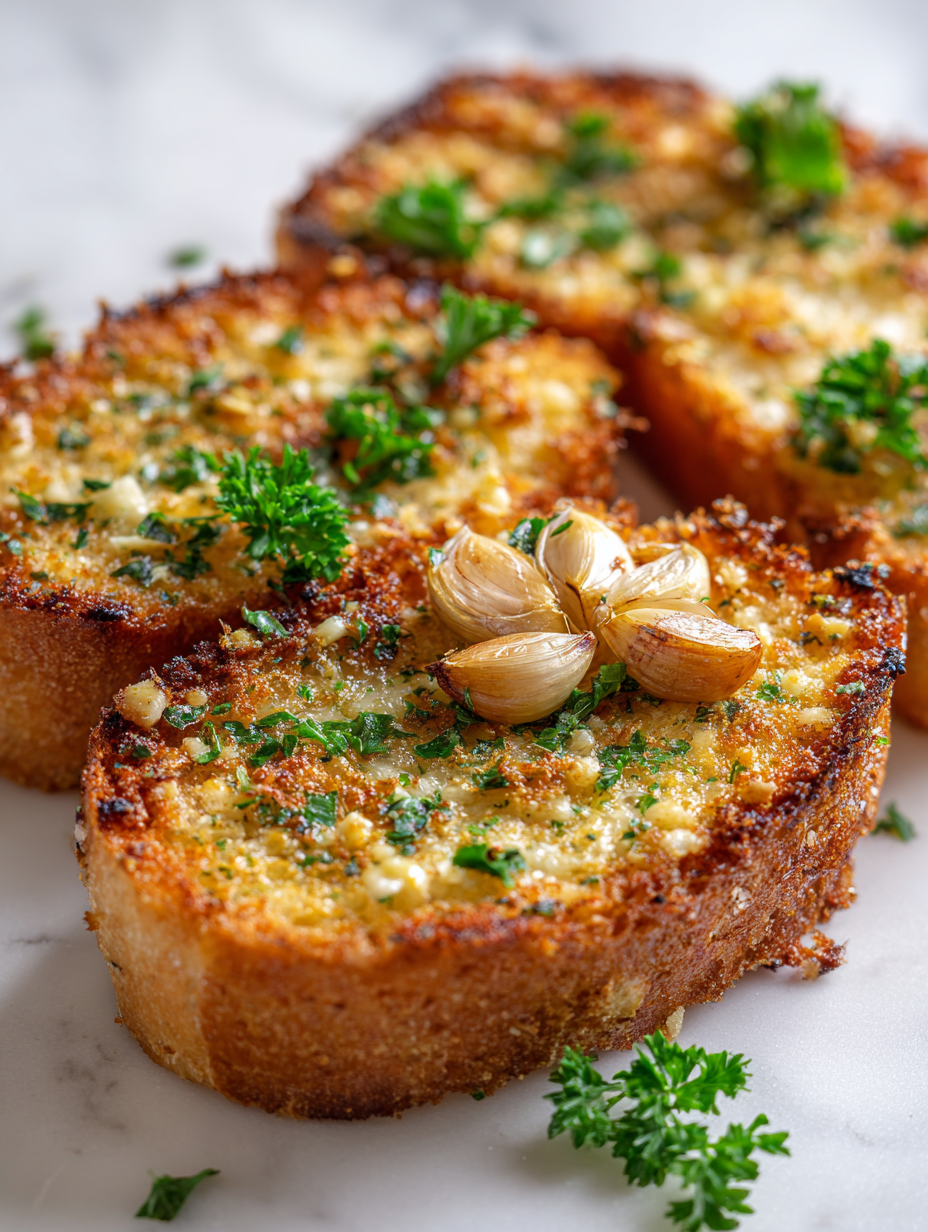
Focusing on the overlooked beauty of crispy, caramelized edges in homemade garlic bread, highlighting how the edges develop a smoky, almost nutty flavor that contrasts with the soft, buttery center, making every bite a balanced dance of textures.
The story behind this recipe
- This garlic bread recipe came together one rainy afternoon when I was craving something warm and satisfying. I wanted to capture a crispy, smoky edge that’s often overlooked in homemade versions. It’s become my go-to for cozy nights and casual gatherings, where everyone appreciates that perfect crunch paired with buttery softness.
- I remember experimenting with different baking times and garlic amounts, trying to find that sweet spot where the edges turn golden and fragrant without burning. That moment when the smell of toasted garlic filled the kitchen — that’s what keeps me coming back to this recipe. It’s simple, honest, and a little messy, just like cooking should be.
- heading: The story behind this recipe
Ingredient breakdown
- Good quality unsalted butter: I use plenty of butter for richness, and you should too—makes the bread ultra-creamy and fragrant. Skip the margarine; it won’t give you the same depth.
- Fresh garlic: I crush mine to release more aroma, which turns sweet and mellow as it bakes. If you want a milder flavor, roast the garlic briefly before mixing.
- Baguette or rustic bread: A crusty loaf with an open crumb stands up well to all that butter and garlic. Softer bread will sog more easily, so choose wisely.
- Parsley: Brightens the whole thing with a fresh, green note. I chop it finely so it distributes evenly—skip if you want a more subdued, classic garlic bread.
- Olive oil: Just a drizzle adds a smoky fruitiness that elevates the butter’s richness. Use a good-quality extra virgin for the best flavor—don’t go cheap here.
- Salt: I like flaky sea salt sprinkled on top before baking—adds a satisfying crunch and enhances the garlic flavor. Adjust if using salted butter.
- Optional: Red pepper flakes or Parmesan: I toss in a pinch for a spicy or cheesy kick, but it’s optional. Both add a layer of complexity that’s worth experimenting with.
Spotlight on Key Ingredients
Butter:
- Good quality unsalted butter: I use plenty of butter for richness, and you should too—makes the bread ultra-creamy and fragrant. Skip the margarine; it won’t give you the same depth.
- Fresh garlic: I crush mine to release more aroma, which turns sweet and mellow as it bakes. If you want a milder flavor, roast the garlic briefly before mixing.
- Baguette or rustic bread: A crusty loaf with an open crumb stands up well to all that butter and garlic. Softer bread will sog more easily, so choose wisely.
Parsley & Olive Oil:
- Fresh parsley: Brightens the whole thing with a fresh, green note. I chop it finely so it distributes evenly—skip if you want a more subdued, classic garlic bread.
- Olive oil: Just a drizzle adds a smoky fruitiness that elevates the butter’s richness. Use a good-quality extra virgin for the best flavor—don’t go cheap here.
Notes for ingredient swaps
- Dairy-Free: Swap butter for coconut oil or a dairy-free margarine. Expect a slightly different richness and a hint of coconut aroma.
- Vegan: Use olive oil or a vegan butter substitute. The flavor will be more herbal and less creamy but still delicious.
- Gluten-Free: Replace the bread with a sturdy gluten-free loaf. Watch for sogginess; bake a bit longer if needed.
- Herb Variations: Substitute parsley with basil or chives for a different fresh note. Each brings a unique brightness.
- Garlic Intensity: Roast the garlic first for a mellow, sweet flavor, or use more raw for a punchy, pungent hit.
- Olive Oil: Use a robust, smoky olive oil for a richer flavor profile—less fruity, more depth.
- Salt: Use flavored salts like smoked or sea salt for an extra layer of taste. Adjust to avoid overpowering the garlic.
Equipment & Tools
- Baking sheet: To hold the bread during baking and ensure even heat exposure.
- Small saucepan: To melt and infuse the butter with garlic aroma.
- Brush: To evenly spread garlic butter over the bread surface.
- Sharp knife: To cut the bread cleanly in half for even baking.
Step-by-step guide to baked garlic bread
- Preheat your oven to 200°C (390°F). Gather all your equipment: a baking sheet (to hold the bread), a small saucepan (to melt butter), a brush (for spreading), and a sharp knife (to cut the bread).
- Slice the baguette or rustic loaf in half lengthwise. Be generous—those crispy edges are what we’re after.
- In the saucepan, melt 100g (7 tbsp) of unsalted butter over medium heat. Add 4 minced garlic cloves, cook for 1-2 minutes until fragrant but not browned. Remove from heat.
- Brush the garlic butter evenly over the cut sides of the bread. Make sure to get into all the nooks; this is where flavor is born.
- Sprinkle chopped parsley (about 2 tbsp) over the buttered sides for a fresh contrast. Add a pinch of flaky sea salt on top of each half—don’t skip this.
- Place the bread halves on the baking sheet, cut side up. Bake at 200°C (390°F) for 12-15 minutes. Check at 12: the edges should be golden and caramelized, not burnt.
- For that extra smoky crunch, switch the oven to broil for 1-2 minutes. Keep a close eye—edges can turn fast from perfect to charred.
- Remove from oven, let rest for 2 minutes to settle. Slice into individual pieces or serve whole, hot and crispy.
- Finish with a light drizzle of olive oil or a sprinkle of Parmesan if you like. Serve immediately for maximum crunch and aroma.
Let the bread rest for 2 minutes out of the oven to settle. Then slice and serve immediately while hot and crispy. Finish with a drizzle of olive oil or sprinkle of Parmesan for extra flavor.
How to Know It’s Done
- Edges are deep golden brown and slightly crispy.
- Garlic scent is fragrant and not burnt—toastiness is key.
- Butter is bubbling and absorbed into the bread, with a slight crackle when pressed.
Crispy-Edge Garlic Bread
Ingredients
Equipment
Method
- Preheat your oven to 200°C (390°F). Slice the bread in half lengthwise, revealing its open crumb and crusty edges.
- In a small saucepan, melt the butter over medium heat, listening for it to bubble gently and smell fragrant. Add the minced garlic and cook for 1-2 minutes until the aroma is rich and fragrant, but not browned.
- Using a brush, evenly spread the warm garlic butter over the cut sides of the bread, making sure to cover all the nooks and crannies. This step infuses the bread with flavor and promotes crispy edges.
- Sprinkle the chopped parsley evenly over the buttered surfaces for a burst of fresh green flavor, then add a pinch of flaky sea salt for extra crunch and taste.
- Place the bread halves cut side up on the baking sheet. Bake in the preheated oven for 12-15 minutes, watching for the edges to turn deep golden brown and caramelized, with a slight char for smoky flavor.
- For an extra crispy top, switch the oven to broil for 1-2 minutes. Keep a close eye so the edges develop a deep, crispy crunch without burning.
- Remove the garlic bread from the oven and let it rest for 2 minutes. Then, slice into pieces or serve whole, showcasing the crispy, caramelized edges and fragrant, buttery interior.
- Enjoy immediately while hot and crispy, perhaps drizzled with a little more olive oil or sprinkled with Parmesan for extra flavor.
Pro tips for perfect garlic bread
- Bolded mini-head: Use room temperature butter to spread easily and promote even melting during baking.
- Bolded mini-head: Mix garlic into the butter thoroughly to ensure a fragrant, uniform garlic flavor in every bite.
- Bolded mini-head: For extra crispy edges, bake the bread on the top rack or switch to broil briefly at the end.
- Bolded mini-head: When brushing the garlic butter, do it generously and evenly for maximum flavor infusion.
- Bolded mini-head: Add parsley just before baking to preserve its bright color and fresh flavor, avoiding wilting.
- Bolded mini-head: Keep an eye on the edges during broiling—edges can turn from perfect to burnt in seconds.
- Bolded mini-head: Let the baked garlic bread rest for a minute or two after baking to firm up before slicing.
Common mistakes and how to fix them
- TOO MUCH BUTTER: Use less butter if bread becomes soggy, fix by reducing amount slightly.
- OVER-TOASTED EDGES: Watch oven closely; reduce broil time if edges burn quickly.
- UNDERRIPE GARLIC: Use fresh, firm garlic; old garlic can be bitter and weak in aroma.
- SOGGY BREAD: Bake longer or at a slightly higher temp to crisp the crust fully.
Quick fixes and pantry swaps
- When bread is soggy, splash with a little more olive oil before baking again.
- If edges are over-torched, shield with foil and lower oven temp slightly.
- Dumped garlic can turn bitter; fix by roasting garlic first for milder sweetness.
- When garlic butter is uneven, brush more thoroughly and ensure even spread before baking.
- When crust is dull, quick 5-second broil can shimmer up crispiness and color.
Prep, store, and reheat tips
- Pre-slice the bread and prepare garlic butter mixture a day ahead; keep refrigerated to save time when baking. The aroma of garlic and butter melds beautifully overnight.
- Store baked garlic bread in an airtight container or tightly wrapped in foil for up to 2 days in the fridge. Expect the bread to soften slightly but still retain its garlicky goodness.
- Reheat in a 180°C (350°F) oven for 5-8 minutes until warm and crispy, or briefly in a skillet. Keep an eye on the edges—watch for that crackling sound of crisping crust.
- For longer storage, freeze individual slices wrapped tightly in plastic wrap and then foil. Defrost at room temperature, then reheat as above. The garlic aroma may mellow slightly, but still flavorful.
Top questions about baked garlic bread
1. Can I use margarine instead of butter?
Use a good-quality unsalted butter for rich, creamy flavor and better aroma. It makes a noticeable difference in taste.
2. Can I make this vegan or dairy-free?
Yes, but the flavor will be less rich and slightly more processed. Butter gives a deeper, more rounded garlic aroma.
3. What’s a good substitute for butter?
Absolutely. Use olive oil or vegan butter. Keep in mind, the texture might be a bit lighter, but still tasty.
4. Can I use sandwich bread instead?
A crusty baguette or rustic loaf works best because they hold up well and develop crispy edges. Softer bread may get soggy.
5. Will it work with softer bread types?
Yes, but it may not crisp up as much. For best results, toast or bake longer to achieve crispy edges.
6. Can I use garlic powder?
Fresh garlic is key for aroma and flavor. Crush or finely chop to release more pungency. Roasting garlic beforehand softens and sweetens it.
7. Is garlic powder a good substitute?
Garlic powder can work, but it won’t have the same punch or aroma as fresh garlic. Use sparingly and add to butter before baking.
8. How do I know when it’s done?
Bake at 200°C (390°F) until edges are deep golden and crispy, about 12-15 minutes. Watch closely during broiling to prevent burning.
9. What should I look for to know it’s ready?
Look for golden, caramelized edges, fragrant garlic aroma, and bubbling butter. The crust should be crispy and edges slightly charred but not burnt.
10. How do I store and reheat leftovers?
Store leftovers wrapped tightly in foil or in an airtight container for up to 2 days. Reheat in the oven at 180°C (350°F) for a few minutes until crispy and fragrant again.
This baked garlic bread might seem simple, but those crispy, smoky edges really elevate it. It’s a reminder that paying attention to the little details makes all the difference in comfort food.
Whenever I make this, I’m struck by how something so humble can evoke such warmth and satisfaction. It’s the kind of bread that’s perfect for sharing, especially when it’s still steaming and fragrant from the oven.

Hi, I’m James Whitmore, the creator behind Salt Evangelist. If there is one ingredient I believe deserves more respect, it is salt. Not because it makes food salty, but because it makes food come alive. Salt highlights sweetness, softens bitterness, sharpens acidity, and deepens savoriness. It is not just seasoning. It is transformation.

