Mini empanadas are more than just a snack; they’re a way to bring people together around a messy, joyful table. I love how each tiny parcel holds a burst of flavor and a piece of shared history. Making them feels like a small act of crafting something special, with your hands and your stories woven into every fold.
What started as a way to use up leftover filling has turned into a ritual of gathering, tasting, and tweaking. There’s a charm in shaping each one, feeling the dough give slightly under your fingertips, listening for that gentle crackle as they bake. These little hand-held pockets turn ordinary ingredients into a celebration of community and comfort.
Focusing on the art of crafting mini empanadas as a communal, hand-held snack that sparks nostalgia and encourages shared moments around the table.
Crafting Nostalgic Handheld Snacks
- These tiny empanadas remind me of childhood summers, sitting around the grill with family, laughter spilling over the sizzling sounds.
- I find joy in shaping each one, feeling the dough give just right under my fingertips, a small act of love in every fold.
- There’s a quiet pride in pulling a tray of golden, crisp empanadas from the oven — like I’ve crafted something truly special.
- Making these is chaos and comfort rolled into one; a messy, satisfying process I always look forward to.
- Sharing these with friends sparks conversations and smiles, turning simple ingredients into shared memories.
The story behind this recipe
- Making these mini empanadas started as a way to use up leftover ingredients, but it quickly became a ritual of creating small, portable bites that feel like a hug. I remember the first time I made them, the smell of warm dough mingling with spicy filling, and how everyone gathered around eager to taste. That moment of sharing something homemade, messy, and flavorful stuck with me.
- Every fold in these empanadas feels like a small act of care, a way to connect over food that’s both simple and satisfying. They’re a reminder that sometimes, the best things come from just playing with dough and filling, not overthinking it. Now, I make them often, especially when I want a snack that’s easy to share, packed with flavor, and totally customizable.
- heading
Historical & Cultural Tidbits
- Mini empanadas trace back to early Spanish and Portuguese settlers who brought pastry techniques to Latin America and beyond.
- In Argentina, these small pockets are a street food staple, often sold hot from market stalls on busy afternoons.
- The concept of tiny, portable snacks like empanadas likely developed from traditional handheld foods around the Mediterranean, evolving uniquely in Latin America.
- Each region has its own fill variations—beef in Argentina, chicken in Colombia, cheese and spinach in parts of Central America—reflecting local tastes.
- Making mini empanadas became popular in home kitchens as a way to serve a crowd with little effort, turning simple ingredients into festive bites.
Key Ingredients Breakdown
- Flour: I use all-purpose because it gives the dough a tender bite, but you can swap in a bit of whole wheat for nuttiness. It’s the backbone of that flaky crust you crave.
- Filling: I love a mix of spiced beef and a splash of smoky paprika—makes your nose tingle with warmth. If you prefer chicken, just cook and shred it first; it soaks up flavors beautifully.
- Onions: I sauté them until they’re golden and fragrant, which adds sweetness and depth. Skip this step if you’re short on time, but the filling will be less rich.
- Olive Oil: Brings a subtle fruitiness to the dough. Use a neutral oil if you want a cleaner crust, but the olive adds a gentle complexity I love.
- Spices & Seasoning: I keep it simple with cumin and a touch of chili powder. For a zestier kick, add a squeeze of lime or some chopped fresh herbs—brightens up the filling.
- Egg Wash: I beat a little egg with water, which gives the empanadas a shiny, golden finish. For a vegan version, just brush with plant-based milk or skip it altogether.
- Optional Extras: A dash of cheese or chopped olives can turn these into a more decadent snack—think of it as a flavor boost for special occasions.
Spotlight on key ingredients
Flour & Filling:
- Flour: I use all-purpose because it gives the dough a tender bite, but you can swap in a bit of whole wheat for nuttiness. It’s the backbone of that flaky crust you crave.
- Filling: I love a mix of spiced beef and a splash of smoky paprika—makes your nose tingle with warmth. If you prefer chicken, just cook and shred it first; it soaks up flavors beautifully.
Onions & Olive Oil:
- Onions: I sauté them until they’re golden and fragrant, which adds sweetness and depth. Skip this step if you’re short on time, but the filling will be less rich.
- Olive Oil: Brings a subtle fruitiness to the dough. Use a neutral oil if you want a cleaner crust, but the olive adds a gentle complexity I love.
Notes for ingredient swaps
- Dairy-Free: Use coconut oil or vegan butter in the dough for a tender crust with a subtle coconut aroma. The texture stays flaky but may be slightly less tender.
- Gluten-Free: Swap all-purpose flour for a 1:1 gluten-free flour blend. Expect slightly crumblier crust, but still delicious with proper handling.
- Low-Sodium: Omit or reduce salt in the dough and filling. The empanadas will be milder, so consider adding extra herbs or spices for punch.
- Vegetarian: Replace meat with sautéed mushrooms, lentils, or cheese. Mushrooms add umami, and cheese makes for a rich, gooey filling.
- Spicy Kick: Add chopped jalapeños or hot sauce to the filling. It’ll bring a smoky heat that complements the savory base.
- Herby Twist: Incorporate fresh cilantro or parsley into the filling. Brightens the flavor and adds a fresh, garden-like aroma.
- Sweet Version: Use fruit preserves or sweetened cream cheese instead of savory fillings. Perfect for a dessert empanada, with a crispy, sugary crust.
Equipment & Tools
- small mixing bowl: to mix and prepare dough and filling
- rolling pin: to roll out dough evenly
- round cutter or glass: to cut out perfect circles for the empanadas
- baking sheet: to bake the empanadas
- pastry brush: to brush egg wash on the empanadas for shine
Step-by-step guide to mini empanadas
- Gather your equipment: a small mixing bowl, a rolling pin, a round cutter or glass (about 3 inches diameter), a baking sheet, and a pastry brush.
- Make the dough: In the bowl, combine 2 cups all-purpose flour, 1/2 teaspoon salt. Add 1/2 cup cold unsalted butter, cut into small pieces. Use your fingers or a pastry cutter to mix until crumbly. Add 1/4 cup cold water, 1 tablespoon at a time, mixing until dough comes together. Knead briefly, then wrap in plastic and chill for 15 minutes.
- Prepare the filling: Sauté 1/2 cup finely chopped onions in 1 tablespoon olive oil over medium heat until golden and fragrant, about 5 minutes. Let cool slightly. Mix with 1/2 pound cooked, shredded beef or chicken, 1 teaspoon cumin, 1/2 teaspoon smoked paprika, salt, pepper, and a squeeze of lime if desired. Adjust seasonings to taste.
- Preheat your oven to 200°C (390°F). Line a baking sheet with parchment paper.
- Roll out the dough on a lightly floured surface to about 1/8 inch thick. Use the round cutter to cut out 12 circles. Gather scraps, reroll if needed.
- Place a spoonful of filling in the center of each dough circle. Fold the dough over to form a half-moon shape. Pinch the edges together firmly, then crimp with your fingers or a fork to seal well.
- Arrange the empanadas on the prepared baking sheet. Brush the tops with a beaten egg for a shiny finish.
- Bake for 20-25 minutes, until golden brown and crispy. Keep an eye on them around the 20-minute mark; they should be evenly golden and crackling slightly.
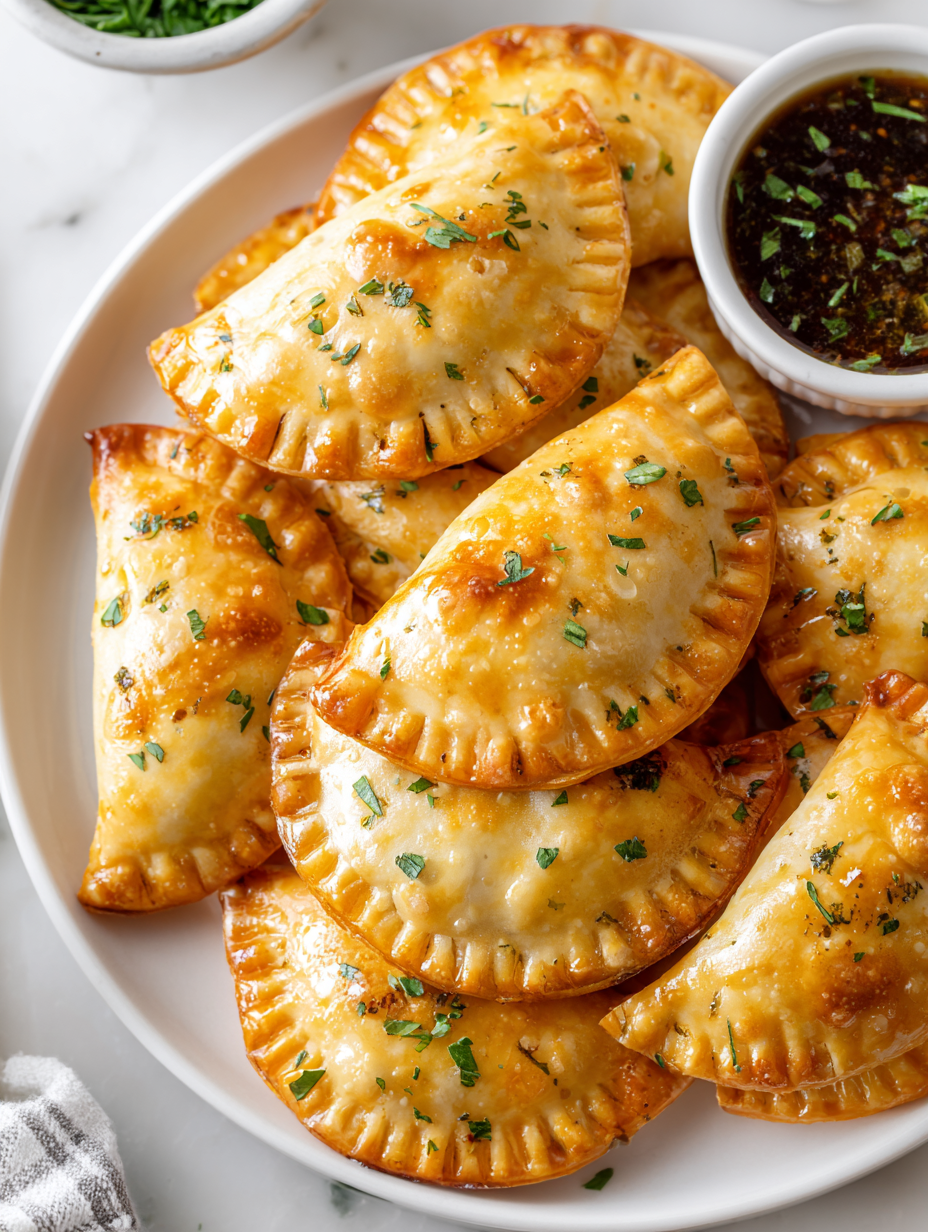
- Remove from oven and let rest for 5 minutes. Serve warm or at room temperature, garnished with herbs if desired.
Let the empanadas rest for 5 minutes after baking to settle. Serve warm, optionally garnished with chopped herbs or a squeeze of lime for extra brightness.
How to Know It’s Done
- Dough edges are sealed tightly with no filling oozing out.
- Empanadas are golden and crisp on top, with a slight crackle when tapped.
- Filling is hot and juicy, with no raw meat or dough visible inside.
Mini Empanadas
Ingredients
Equipment
Method
- In a small bowl, combine the flour and salt. Add the cold butter and use your fingers or a pastry cutter to work it into the flour until the mixture resembles coarse crumbs.
- Gradually pour in cold water, a little at a time, mixing gently until the dough begins to come together. Knead briefly on a floured surface until smooth, then wrap in plastic wrap and chill for 15 minutes to relax the gluten.
- While the dough chills, heat olive oil in a skillet over medium heat. Sauté the chopped onions until golden and fragrant, about 5 minutes. Let them cool slightly.
- In a mixing bowl, combine the cooked shredded meat, sautéed onions, cumin, smoked paprika, salt, and pepper. Mix well to evenly distribute the spices and flavors.
- Preheat your oven to 200°C (390°F) and line a baking sheet with parchment paper. Remove the dough from the fridge and roll it out on a floured surface to about 1/8 inch thick.
- Use a round cutter or glass about 3 inches in diameter to cut out 12 circles from the dough. Gather the scraps and reroll if needed to make more circles.
- Place a spoonful of filling in the center of each dough circle. Fold the dough over to form a half-moon shape, then pinch or crimp the edges firmly to seal in the filling.
- Arrange the filled empanadas on the prepared baking sheet. Brush the tops with beaten egg mixed with a teaspoon of water for a shiny, golden finish.
- Bake in the preheated oven for 20-25 minutes, until the empanadas are golden brown and crispy, with a crackling sound when tapped.
- Remove from the oven and let rest for 5 minutes. Serve warm, optionally garnished with chopped herbs or a squeeze of lime.
Pro tips for perfect empanadas
- Edges: Chill the dough before rolling to keep it firm and prevent tearing.
- Crackling Top: Brush with egg wash for a shiny, crisp finish that crackles as you bite in.
- Filling Balance: Keep filling moist but not too juicy to avoid soggy bottoms and leaks.
- Seal Tightly: Press edges firmly and crimp to prevent filling from escaping during baking.
- Even Baking: Rotate the tray halfway through for uniform golden color and crispness.
- Oven Hotspot: Place tray in the middle of the oven to avoid uneven browning.
- Cooling Trick: Rest baked empanadas 5 minutes on a wire rack to keep crust crispy.
Common mistakes and how to fix them
- FORGOT to seal edges → Use a fork for a tighter seal.
- DUMPED filling → Keep filling away from the edges to prevent leaks.
- OVER-TORCHED empanadas → Reduce oven temperature or bake for less time.
- UNDERSALTED dough → Add a pinch more salt to enhance flavor.
Quick fixes and pantry swaps
- If filling leaks, chill empanadas briefly before baking to tighten seals.
- Splash a little water on edges if dough cracks during sealing.
- Patch tiny tears with a dab of leftover dough before baking.
- Shield edges with foil if they brown too quickly, leaving centers undercooked.
- When empanadas are too soft, re-crisp in a hot oven for 5 minutes, smell for that crackle.
Prep, store, and reheat tips
- You can prepare the dough and shape the empanadas a day in advance; keep them covered in the fridge to prevent drying out. The dough becomes more pliable and easier to work with after resting.
- Store baked empanadas in an airtight container in the fridge for up to 2 days. They will lose some crispness but remain flavorful and satisfying when reheated.
- For longer storage, freeze unbaked empanadas on a tray until firm, then transfer to a bag. They can be frozen for up to 1 month. Bake directly from frozen, adding a few extra minutes.
- Reheat in a 180°C (350°F) oven until warmed through and crispy, about 10-12 minutes. For microwave reheating, cover and heat until steaming hot, but expect softer crusts. Sensory note: look for a warm, crispy exterior and bubbling filling.
Top questions about mini empanadas
1. How do I get perfectly round empanadas?
Use a sharp knife or a small cutter to get clean, even circles—this helps seal edges properly.
2. Why does my dough keep sticking?
Chill the dough for at least 15 minutes; it firms up and makes rolling easier without sticking.
3. How do I know when they’re done?
Bake at 200°C (390°F) until golden and crispy, about 20-25 minutes. Keep an eye after 20 minutes.
4. My empanadas are opening during baking, what do I do?
Seal edges tightly with your fingers or a fork. If filling leaks, chill before baking to help the seal stick.
5. What if the edges crack while sealing?
Use a damp cloth to wipe edges if dough cracks while sealing—it helps keep everything together.
6. How should I reheat leftover empanadas?
Reheat in a 180°C (350°F) oven for 10 minutes until crispy. Microwave will soften crust, best for quick warming.
7. How do I prevent soggy empanadas?
Fill with moist but not runny ingredients. Too much juice can cause sogginess and leaks during baking.
8. Can I make these in advance?
You can prep the filling and shape the empanadas ahead, then keep covered in the fridge for up to a day.
9. Can I freeze mini empanadas?
Freeze unbaked empanadas on a tray, then transfer to a bag. Bake directly from frozen, adding extra minutes.
10. Why do my empanadas look dull after baking?
Use a brush to apply egg wash for a shiny, golden finish. Skip for vegan versions, or try plant-based milk.
These tiny empanadas aren’t just about the flavor—they’re about the hands-on, imperfect joy of making something with care. Each fold, each golden edge, carries a bit of my kitchen chaos and a lot of nostalgia. They’re perfect for sharing, whether at a casual gathering or a quiet moment alone.
In a world that moves fast, these little pockets slow us down just enough to savor the smell of warm dough and savory filling. They remind me that simple ingredients, handled with a bit of love and patience, can turn into something memorable. That’s what keeps me coming back to this recipe, again and again.

Hi, I’m James Whitmore, the creator behind Salt Evangelist. If there is one ingredient I believe deserves more respect, it is salt. Not because it makes food salty, but because it makes food come alive. Salt highlights sweetness, softens bitterness, sharpens acidity, and deepens savoriness. It is not just seasoning. It is transformation.

