Mini sliders might seem like a simple party snack, but I’ve found they’re actually a little secret weapon for busy weeknights. The best part? You can prep most of them ahead, so when dinner rush hits or last-minute guests arrive, you’re not scrambling. It’s all about making flavorful, portable bites that don’t sacrifice on taste or texture.
I love how these sliders can be customized endlessly—think smoky cheeses, tangy pickles, or even a hint of spicy mustard. They’re forgiving, forgiving enough to experiment with and still come out perfectly juicy and satisfying. Plus, they’re just fun to assemble—like little sandwiches you get to play with, which makes dinner feel a bit more laid-back and a lot more enjoyable.
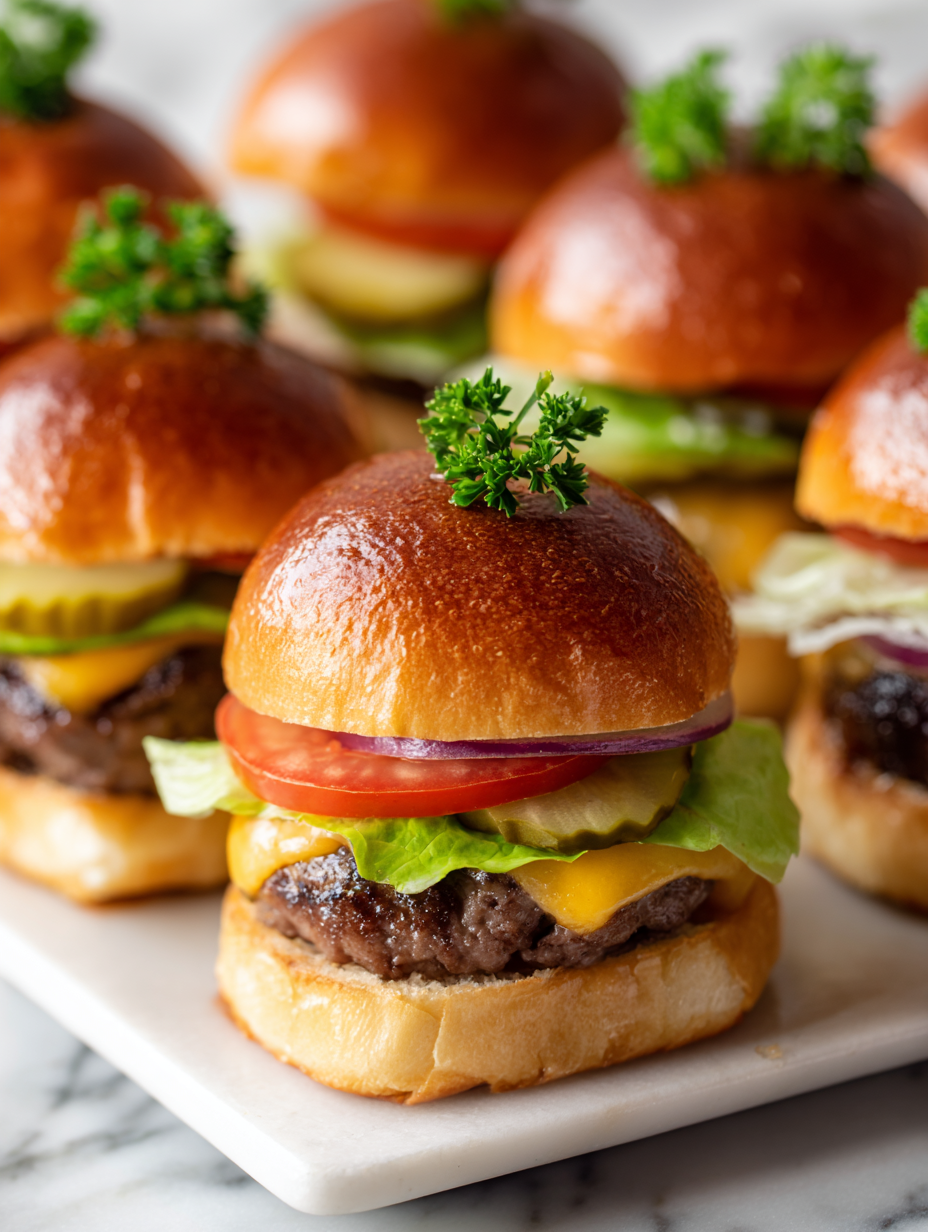
Focusing on creating mini sliders that are perfect for making ahead, so you can assemble a batch of savory, portable bites for parties or busy weeknights without fuss.
Mini Sliders for Make-Ahead Magic
- These sliders remind me of summer cookouts with family, the smell of grilled meat mingling with laughter.
- I get a little thrill every time I see how quickly friends devour them—like magic in mini form.
- There’s a nostalgic comfort in assembling these, reminiscent of childhood snacks but with grown-up flavors.
- Messing with different cheeses and toppings keeps me excited—no two batches need to be the same.
- Nothing beats the pride of pulling out a tray of perfectly juicy sliders at a party, knowing they’re a hit.
The story behind this recipe
- I remember the first time I made mini sliders for a casual backyard gathering. I was experimenting with different ways to make them feel special, even though they’re so simple. That night, I realized how these tiny sandwiches could turn a regular dinner into a fun, interactive experience. It’s the kind of dish that invites everyone to customize their bites, making each slider a little personal statement.
- What started as a humble experiment has become my go-to for lazy weekends and quick parties. There’s something satisfying about stacking these little layers—meat, cheese, pickles—and seeing everyone’s eyes light up. They’re forgiving, versatile, and just enough mess to make them feel real. Honestly, they remind me that sometimes, the simplest foods bring the biggest joy.
- heading: The story behind this recipe
Mini Sliders Trivia
- Mini sliders originated in the 1980s as a way to serve small, manageable portions for busy diners and bar patrons.
- The term ‘slider’ is believed to come from the sliding sound of a burger patty on a grill, or from sailors’ slang referring to small, quick meals.
- These tiny sandwiches gained popularity at roadside diners and eventually became a staple for party platters and casual gatherings.
Key Ingredients Breakdown
- Ground beef: I like using 80/20 for juicy, flavorful bites—skip leaner options unless you want dryness, then add a splash of broth or a bit of butter to keep them moist.
- Mini buns: Soft brioche or potato rolls are my go-to—they’re tender and slightly sweet, which balances the savory meat. Toast them lightly for extra flavor and crunch.
- Cheese slices: Sharp cheddar melts beautifully and adds a punch—if you prefer milder, try Swiss or provolone, but don’t skip the melty texture.
- Pickles: Crunchy, tangy slices give a refreshing contrast. Freshly sliced dill pickles brighten the whole slider—skip if you like a milder bite.
- Condiments: Mustard, ketchup, or a dollop of aioli—layered carefully, they add moisture and zing. Spicy mustard or smoky BBQ sauce can really elevate the flavor.
- Onions: Thinly sliced and caramelized, they add sweetness and depth. Raw onions work too if you want sharper bite—just rinse them in cold water first.
- Seasoning: Salt, pepper, a pinch of smoked paprika—don’t be shy, it’s the flavor foundation. Try a dash of Worcestershire in the meat mixture for extra umami.
Spotlight on key ingredients
Ground beef:
- I prefer 80/20 for juiciness—skip leaner, or add a splash of broth if you do. The fat gives that rich, melt-in-your-mouth feel.
- Mini buns: Soft brioche or potato rolls are my favorite—they’re tender, slightly sweet, and toast up beautifully for a lightly crisp exterior. Light toasting makes a big difference.
Cheese and pickles:
- Cheese slices: Sharp cheddar melts smoothly and adds a punch of flavor—try Swiss or provolone if you want a milder, creamier melt. Watch it melt quickly, about a minute on low heat.
- Pickles: Crunchy dill slices bring a bright, tangy contrast. Freshly sliced pickles add a crisp, refreshing bite—skip if you prefer milder flavors.
Ingredient Swap Tips
- Dairy-Free: Use dairy-free cheese slices or omit cheese altogether. The sliders will be less gooey but still flavorful.
- Gluten-Free: Swap mini buns for small gluten-free rolls or lettuce wraps. Expect a different texture but still satisfying.
- Lower-Sodium: Choose unsalted or low-sodium condiments and season the meat more gently to suit your taste.
- Vegetarian: Replace beef patties with seasoned plant-based or mushroom caps. Keep in mind they won’t have the same juiciness.
- Vegan: Use vegan burger patties, plant-based cheese, and vegan-friendly buns. Add extra herbs for flavor punch.
- Sweet Buns: Use brioche or sweet rolls if you prefer a richer, slightly sweeter bite. Be mindful of added sugars.
- Spicy Kick: Add a dash of hot sauce or sliced jalapeños to the meat mixture or toppings for more heat.
Equipment & Tools
- small baking sheet: For toasting buns or holding assembled sliders.
- skillet: To cook and sear the mini patties.
- spatula: To flip patties and handle cooking process.
- small brush: For glazing buns or applying oil to skillet.
Mini Sliders Prep Guide
- Gather all equipment: small baking sheet, skillet, spatula, and a small brush for glazing.
- Preheat your skillet over medium-high heat (~180°C / 356°F).
- Shape the ground beef into mini patties about 2 inches in diameter. Keep them slightly thicker (~1 cm) for juiciness.
- Season patties generously with salt, pepper, and smoked paprika. Press a small indentation in the center of each to prevent puffing.
- Place patties in the hot skillet. Cook for about 3 minutes per side until a rich brown crust forms. Check for a caramelized exterior.
- If using cheese, place a slice on each patty during the last minute of cooking to melt. Cover the skillet briefly to encourage melting.
- While patties cook, toast mini buns lightly in the oven or on a separate skillet for 2–3 minutes until golden.
- Remove patties and buns from heat. Let the patties rest for 2 minutes to redistribute juices.
- Assemble sliders: spread condiments on buns, add a patty, then top with pickles and onions. Cap with the top bun.
- Serve immediately, or if making ahead, keep assembled in an airtight container in the fridge for up to 4 hours. Reheat in a warm skillet for 1–2 minutes if needed.
Let the patties rest briefly to retain juiciness. Assemble sliders just before serving for best texture. Serve on a platter with sides or as finger food.
How to Know It’s Done
- Patties are evenly browned and slightly firm to the touch.
- Cheese is melted and gooey, with a slight crackle when pressed.
- Buns are toasted to light golden, with a faint aroma of butter.
Mini Sliders for Make-Ahead Magic
Ingredients
Equipment
Method
- Preheat your skillet over medium-high heat until hot and slightly shimmering. Meanwhile, shape the ground beef into 8 small, round patties about 2 inches in diameter, making them slightly thicker in the middle.
- Season each patty generously with salt, pepper, and a pinch of smoked paprika. Use your thumb to make a small indentation in the center of each to prevent puffing during cooking.
- Place the patties carefully onto the hot skillet, hearing a satisfying sizzle. Cook for about 3 minutes on each side until the outside develops a deep, caramelized crust.
- During the last minute of cooking, lay a slice of cheese on each patty and cover the skillet briefly to melt the cheese until gooey and smooth.
- While the patties cook, split the mini buns and lightly toast them on a baking sheet or in a separate skillet until golden and slightly crisp—about 2–3 minutes.
- Remove the cooked patties from the skillet and let them rest for 2 minutes. This helps keep the juices locked in, ensuring each slider is juicy.
- Spread mustard or your preferred condiment on the bottom halves of the toasted buns. Place a juicy beef patty on each, then layer with pickles and sliced onions.
- Top each slider with the remaining bun halves, gently pressing down to secure the fillings. Serve immediately for the best texture, or store assembled in an airtight container for up to 4 hours.
Pro Tips for Perfect Sliders
- Gentle sear: Use medium-high heat and avoid moving the patties too early to develop a rich, caramelized crust.
- Indent center: Press a small dimple into each patty before cooking to prevent puffing and ensure even doneness.
- Cheese melt: Place cheese on the patties during the last minute and cover the skillet briefly for gooey, uniform melting.
- Toasting buns: Lightly toast mini buns in the skillet or oven until golden—adds crunch and prevents sogginess.
- Rest meat: Let cooked patties rest for 2 minutes to lock in juices and keep sliders juicy in every bite.
- Assembly prep: Lay out condiments and toppings before you start cooking to streamline assembly and avoid chaos at the last moment.
- Use fresh pickles: Slice just before assembling for maximum crunch and tang—skip pre-sliced if they’ve been sitting too long.
Common mistakes and how to fix them
- FORGOT to check patty temperature → Use a meat thermometer to avoid overcooking.
- DUMPED the cheese too early → Wait until last minute for melting to prevent dryness.
- OVER-TORCHED buns → Toast buns gently, watch carefully to prevent burning.
- MISSED resting time for patties → Rest for 2 minutes to keep juices intact.
Quick Fixes and Pantry Swaps
- If patties fall apart, add a touch of breadcrumbs or an egg to bind better.
- When buns are too soft, splash a little water on them and toast quickly for crispness.
- Patch over a burnt bun with a slice of fresh bread or toast to save the bite.
- When cheese isn’t melting well, cover the skillet for a minute to encourage gooeyness.
- Shield delicate toppings with a piece of foil if they start to char during reheating.
Prep, store, and reheat tips
- Prep the patties and toast the buns a day ahead; keep patties in an airtight container in the fridge for up to 24 hours. The flavors deepen overnight.
- Assemble sliders just before serving if possible; if needed, keep components separate and assemble within 2 hours for freshest texture and flavor.
- Refrigerate leftovers in an airtight container; best enjoyed within 2 days. Reheat patties in a hot skillet for 1–2 minutes until warmed through and slightly crispy.
- For reheating, avoid microwave to prevent sogginess; skillet reheating preserves the crispy edges and juicy interior. Expect a warm, savory aroma and slight sizzle.
Top questions about mini sliders
1. How do I tell when the patties are cooked?
Use a meat thermometer to check for 160°F (71°C) for safety and juiciness.
2. When should I add the cheese?
Place cheese on the patties during the last minute of cooking and cover briefly to melt perfectly.
3. How do I prevent buns from becoming soggy?
Toast the buns lightly until golden and slightly crispy so they don’t get soggy from toppings.
4. Why rest the patties before serving?
Let the cooked patties rest for 2 minutes to lock in juices before assembling the sliders.
5. Can I make these sliders in advance?
Assemble just before serving for best texture, but components can be prepped a day ahead and refrigerated.
6. How do I reheat leftovers without sogginess?
Reheat assembled sliders in a hot skillet for 1–2 minutes until warmed through and crispy on the edges.
7. How do I keep the patties flat and even?
Use a small dimple pressed into each patty before cooking to prevent puffing and ensure even doneness.
8. What kind of beef works best?
Choose 80/20 ground beef for juicy, flavorful bites; leaner beef will be drier, so add a splash of broth if you prefer leaner.
9. How can I boost the flavor of the patties?
For extra flavor, add a pinch of smoked paprika or Worcestershire sauce into the meat mixture.
10. What are the best toppings for flavor and texture?
Use freshly sliced pickles and toast the buns for maximum crunch and bright, tangy contrast.
These mini sliders are more than just a fun appetizer; they’re a way to bring people together around simple, flavorful bites. Whether you’re prepping for a busy weeknight or a last-minute gathering, they’re reliable and endlessly customizable.
In a season where quick, satisfying comfort food feels especially precious, these sliders offer a little bit of joy in every mini bite. They’re imperfect, approachable, and just enough messy to keep things real. Keep experimenting and enjoy every savory, portable moment.

Hi, I’m James Whitmore, the creator behind Salt Evangelist. If there is one ingredient I believe deserves more respect, it is salt. Not because it makes food salty, but because it makes food come alive. Salt highlights sweetness, softens bitterness, sharpens acidity, and deepens savoriness. It is not just seasoning. It is transformation.

